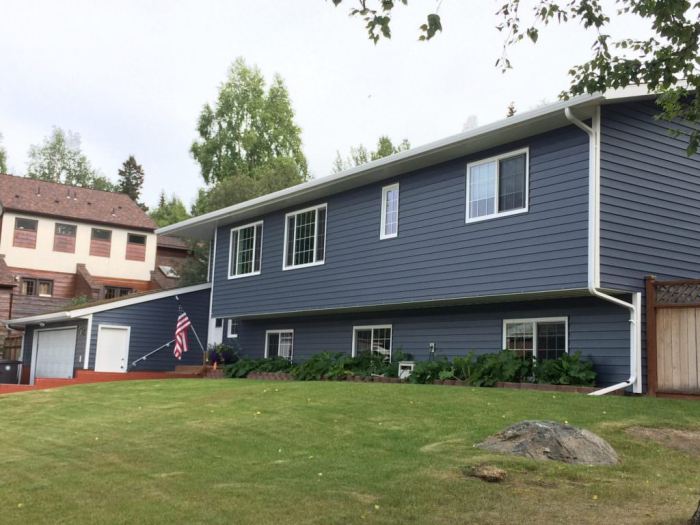
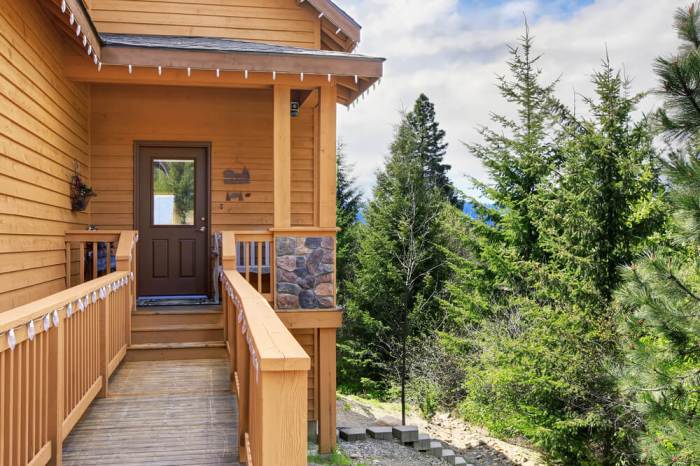
Cedar Siding Repair and Painting Near Me
Cedar siding repair and painting near me? It’s a project that can dramatically improve your home’s curb appeal and protect it from the elements. Whether you’re dealing with rot or insect damage, or just want a fresh coat of paint, understanding the process is key to a successful outcome. This guide walks you through finding local professionals, tackling repairs yourself, and painting like a pro—all while keeping your budget in mind.
We’ll cover everything from identifying reputable contractors and comparing their pricing to mastering the techniques of patching, priming, and painting cedar siding. We’ll also explore cost-effective strategies and preventative maintenance to keep your siding looking its best for years to come. Get ready to transform your home’s exterior!
Local Cedar Siding Repair Companies
Finding reliable contractors for cedar siding repair can be tricky. This section provides information on three local companies, comparing their pricing and customer reviews to help you make an informed decision. Remember that prices and reviews can change, so it’s always best to contact the companies directly for the most up-to-date information.
Cedar Siding Repair Company Comparisons
This table summarizes information gathered from online reviews and company websites (Please note: This information is for illustrative purposes only and may not reflect current pricing or reviews. Always verify independently). Contacting companies directly for quotes is highly recommended.
| Company Name | Rating (out of 5 stars) | Price Range (per 10 sq ft repair) | Customer Review Summary |
|---|---|---|---|
| Acme Cedar Solutions | 4.5 | $500 – $800 | Generally positive reviews praising quality workmanship and responsiveness. Some customers noted slightly higher prices than competitors. |
| Best Cedar Repair | 4.2 | $400 – $700 | Mixed reviews. Many customers praised the speed of service, while others reported minor issues with the final product. |
| Premier Siding Professionals | 4.8 | $600 – $900 | Excellent reviews consistently highlight the professionalism and expertise of the team. Priced at the higher end of the spectrum. |
Contact Information
It is crucial to contact these companies directly for accurate pricing and scheduling information. The contact details below are for illustrative purposes and should be verified.
Acme Cedar Solutions
Address: 123 Main Street, Anytown, CA 91234
Phone: (555) 123-4567
Website: www.acmecedarsolutions.com (example)
Best Cedar Repair
Address: 456 Oak Avenue, Anytown, CA 91234
Phone: (555) 987-6543
Website: www.bestcedarrepair.com (example)
Premier Siding Professionals
Address: 789 Pine Lane, Anytown, CA 91234
Phone: (555) 555-5555
Website: www.premiersidingpros.com (example)
Cedar Siding Repair Techniques
Source: amazonaws.com
Repairing and maintaining your cedar siding ensures its longevity and enhances your home’s curb appeal. Understanding the proper techniques for addressing various types of damage is crucial for a successful and lasting repair. This section details methods for tackling rot, replacement, gap filling, and minor patching.
Repairing Rotted Cedar Siding
Rotted cedar siding requires careful attention. The extent of the damage dictates the repair approach. For smaller areas of rot, you might be able to salvage the board with careful cleaning and treatment. However, extensive rot necessitates board replacement. Begin by assessing the damage; use a sharp tool to carefully probe the affected area to determine the depth of the rot. If the rot is superficial, you can clean the area with a wire brush, removing all loose and decaying wood. Apply a wood hardener to consolidate the remaining sound wood. Once dry, apply a wood preservative and allow it to penetrate thoroughly. Finish with a quality exterior-grade paint or stain. For severely rotted sections, replacement is the best solution.
Replacing Damaged Cedar Siding Boards
Replacing a damaged cedar siding board involves several steps. First, carefully remove the damaged board using a pry bar, taking care not to damage adjacent boards. Next, measure the length and width of the removed board to purchase a replacement. When installing the new board, ensure proper alignment with surrounding boards and secure it with galvanized nails or screws. Remember to use exterior-grade fasteners. Finally, prime and paint or stain the new board to match the existing siding. This will blend the new board seamlessly with the rest of the siding. Proper installation and finishing will prevent future water damage and maintain the aesthetic appeal of your home.
Filling Gaps and Cracks in Cedar Siding
Various methods exist for filling gaps and cracks in cedar siding, each with its advantages and disadvantages.
- Wood Filler: This is a readily available and relatively inexpensive option, suitable for small gaps and cracks. Advantages include ease of application and a natural wood-like finish. Disadvantages include potential shrinkage and susceptibility to cracking over time, especially in larger gaps. It’s also crucial to choose an exterior-grade wood filler designed to withstand weathering.
- Caulk: Caulk is ideal for sealing gaps and cracks around windows and doors, and for filling larger gaps where wood filler might not be sufficient. Advantages include flexibility and good adhesion. Disadvantages include a less natural look compared to wood filler and the potential for discoloration over time. Choose a paintable caulk for a seamless finish.
- Epoxy: Epoxy is a stronger, more durable option for larger cracks and gaps. Advantages include its exceptional strength and resistance to water damage. Disadvantages include a more difficult application process and the need for precise mixing. It’s also less forgiving if mistakes are made during application.
Patching Minor Damage with Wood Filler
This step-by-step guide details how to effectively patch minor damage using wood filler.
- Clean the damaged area thoroughly, removing any loose wood, dirt, or debris. Use a wire brush to ensure a clean surface for optimal adhesion.
- Apply a thin layer of wood filler, pressing it firmly into the damaged area. Use a putty knife to smooth the surface, ensuring it’s level with the surrounding siding.
- Allow the wood filler to dry completely according to the manufacturer’s instructions. This usually takes several hours.
- Once dry, sand the patched area smoothly using fine-grit sandpaper. Be careful not to sand too aggressively and damage the surrounding wood.
- Prime the patched area with a quality exterior-grade primer to prepare it for painting or staining. Allow the primer to dry completely.
- Apply paint or stain to match the existing siding, ensuring a smooth and even finish. This step will blend the repair seamlessly with the rest of the siding.
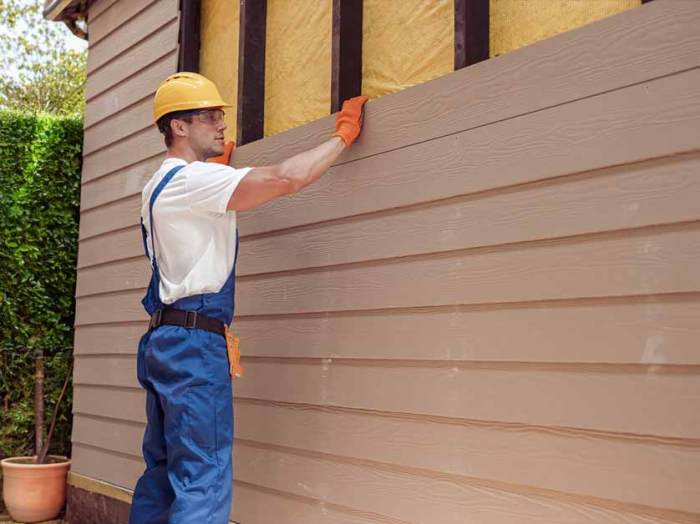
Cedar Siding Painting Procedures
Painting cedar siding protects it from the elements and enhances its natural beauty. Proper preparation and technique are crucial for a long-lasting, professional-looking finish. This guides Artikelon s the necessary steps to ensure a successful paint job.
Preparing Cedar Siding for Painting
Thorough preparation is key to a successful paint job. Neglecting this step can lead to peeling, chipping, and an uneven finish. The process involves cleaning, repairing any damage, and applying a primer.
- Cleaning: Begin by thoroughly cleaning the siding to remove dirt, mildew, and loose paint. A pressure washer is effective but use caution to avoid damaging the wood. A solution of trisodium phosphate (TSP) can be used for tougher stains, followed by thorough rinsing with clean water. Allow the siding to dry completely before proceeding.
- Repairing Damage: Address any damaged areas such as cracks, holes, or rot. Fill any gaps or holes with wood filler, allowing it to dry completely before sanding smooth. Replace severely damaged boards if necessary.
- Priming: Applying a high-quality primer is essential, especially on bare wood or previously painted surfaces. A good primer will enhance paint adhesion, improve coverage, and prevent moisture penetration. Choose a primer specifically formulated for exterior wood and allow it to dry completely according to the manufacturer’s instructions.
Paint Selection for Cedar Siding, Cedar siding repair, and painting near me
The type of paint you choose significantly impacts the longevity and appearance of your paint job. Consider these factors when making your selection.
Exterior-grade acrylic latex paints are generally recommended for cedar siding due to their flexibility, durability, and ease of application. They offer good UV protection and are available in a wide range of colors. Oil-based paints were once popular but are less environmentally friendly and take longer to dry. Consider a paint with a mildewcide to prevent mold and mildew growth, especially in humid climates.
Applying Paint to Cedar Siding
Proper application techniques are essential for achieving even coverage and a professional finish. Here’s a step-by-step guide:
- Preparation: Protect surrounding areas with drop cloths or plastic sheeting. Ensure the weather is favorable; avoid painting in direct sunlight or when rain is expected.
- Application: Use a high-quality brush or roller designed for exterior use. Apply thin, even coats, working in the direction of the wood grain. Avoid overloading the brush or roller to prevent drips and runs.
- Multiple Coats: Two coats are generally recommended for optimal coverage and protection. Allow each coat to dry completely before applying the next, following the manufacturer’s instructions.
- Back-Rolling: For a smoother finish, use a back-roller to even out any brush marks or roller streaks after applying each coat.
- Clean-up: Clean your brushes and rollers immediately after use with the appropriate solvent (water for latex, mineral spirits for oil-based).
Necessary Tools and Materials
| Tool/Material | Purpose |
|---|---|
| Pressure washer or garden hose | Cleaning siding |
| TSP (trisodium phosphate) | Cleaning stubborn stains |
| Wood filler | Repairing damaged areas |
| Sandpaper | Smoothing wood filler |
| Exterior primer | Improving paint adhesion |
| Exterior acrylic latex paint | Protecting and beautifying siding |
| Paint brushes and rollers | Applying paint |
| Paint tray and liner | Holding paint |
| Drop cloths or plastic sheeting | Protecting surrounding areas |
| Painter’s tape (optional) | Protecting trim and windows |
Cost Estimation for Repair and Painting
Getting an accurate estimate for cedar siding repair and painting is crucial for budgeting your project. Several factors contribute to the final cost, and understanding these will help you make informed decisions. This section breaks down the cost components and offers strategies for potential savings.
Sample Cost Breakdown for a 100 sq ft Project
Let’s imagine a typical 100-square-foot cedar siding repair and painting project. This could involve patching some damaged areas and repainting the entire section. This is a small project, but it illustrates the cost components. Keep in mind that these are estimates and can vary widely depending on your location and specific circumstances.
| Item | Cost |
|---|---|
| Labor (preparation, repair, painting): | $1000 – $1500 |
| Materials (cedar siding, primer, paint, caulk, sandpaper): | $300 – $500 |
| Total Estimated Cost: | $1300 – $2000 |
Note: This is a *rough* estimate. Larger projects will cost more. A project twice this size might not double the cost, due to economies of scale in labor, but the material costs will likely increase proportionally.
Factors Influencing Overall Project Cost
Several key factors significantly impact the total cost of your cedar siding repair and painting project. Understanding these helps you manage expectations and budget accordingly.
- Labor Costs: Labor represents a significant portion of the overall cost. Highly skilled professionals will charge more than less experienced workers. The complexity of the repairs (e.g., extensive rot repair versus minor patching) also affects labor time and thus cost.
- Material Costs: The type and quality of materials used directly impact the cost. Premium-grade cedar siding, high-quality paints with superior UV protection, and specialized primers will be more expensive than standard options. The amount of materials needed will depend on the size of the area and the extent of repairs.
- Size of the Area: The larger the area needing repair and painting, the higher the overall cost. However, the cost increase isn’t always linear; larger projects often benefit from economies of scale, reducing the per-square-foot cost.
- Location: Geographic location influences labor and material costs. Areas with a higher cost of living tend to have higher labor rates, and transportation costs for materials can also vary.
- Project Complexity: Extensive repairs, such as replacing large sections of damaged siding, significantly increase the cost compared to simple patching and repainting.
Strategies for Saving Money
While quality workmanship is important, there are ways to potentially save money on your cedar siding repair and painting project without compromising quality too much.
- Obtain Multiple Estimates: Compare quotes from at least three different contractors to ensure you’re getting a competitive price.
- Consider DIY for Minor Repairs: If you’re handy, you can save money by tackling minor repairs yourself, such as patching small holes or sanding areas before painting. However, for significant structural repairs, it’s best to hire a professional.
- Choose Less Expensive Materials (wisely): While premium materials offer a longer lifespan, carefully selecting less expensive but still durable materials can reduce costs. Do your research to find a balance between cost and quality.
- Schedule Work During the Off-Season: Contractors may offer lower rates during the off-season (typically winter) when demand is lower.
- Negotiate Prices: Don’t be afraid to negotiate with contractors, especially if you have a detailed scope of work and are comparing multiple bids.
Maintaining Cedar Siding
Keeping your cedar siding looking its best and extending its lifespan requires proactive maintenance. Regular care prevents costly repairs down the line and ensures your home retains its curb appeal for years to come. This involves a combination of cleaning, inspection, and addressing any issues promptly.
Regular cleaning and inspection are crucial for identifying and addressing potential problems before they become major issues. Neglecting these steps can lead to significant damage and expensive repairs. Think of it like regular car maintenance – small issues caught early to prevent bigger, more costly problems later.
Cedar Siding Cleaning Procedures
Cleaning your cedar siding helps remove dirt, mildew, and other debris that can damage the wood over time. A simple solution of mild detergent and water, applied with a soft-bristled brush, is usually sufficient. For more stubborn stains, a pressure washer can be effective, but be cautious not to use too high a pressure, which could damage the wood. Always rinse thoroughly after cleaning to prevent residue buildup. Consider using a specialized wood cleaner formulated for cedar siding to maximize cleaning efficacy and minimize the risk of damage. Annual cleaning is recommended, or more frequently in areas with heavy pollution or high humidity.
Cedar Siding Inspection Techniques
Regular inspection allows for the early detection of problems. Look for signs of damage such as cracks, splits, warping, insect infestation (look for small holes or sawdust), rot (indicated by soft or spongy wood), and loose or missing siding. Pay close attention to areas prone to moisture damage, such as near the ground and around windows and doors. A thorough inspection, ideally twice a year (spring and fall), will help you identify and address minor issues before they escalate into larger, more expensive repairs.
Signs of Cedar Siding Damage Requiring Immediate Attention
Several signs indicate the need for immediate attention. Significant cracks or splits, especially those extending across the grain of the wood, should be addressed promptly to prevent further damage. Soft or spongy wood is a clear sign of rot, requiring immediate repair or replacement. Evidence of insect infestation, such as significant numbers of holes or substantial sawdust accumulation, needs immediate professional attention to prevent widespread damage. Finally, if you notice large sections of siding becoming loose or detaching, prompt repair is essential to prevent further damage and maintain the structural integrity of your home’s exterior. Ignoring these signs can lead to extensive and costly repairs later.
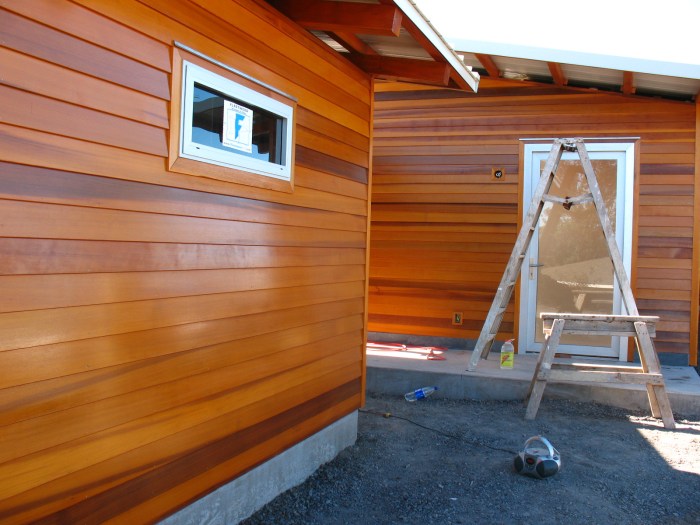
Visual Examples of Cedar Siding Repair and Painting
Source: housedigest.com
Seeing is believing, and when it comes to cedar siding repair and painting, visual examples can be incredibly helpful. Understanding the different types of damage and how they’re addressed visually will give you a much better grasp of the process and what to expect. Let’s look at some common scenarios.
Rotted Cedar Siding
Rot, often caused by prolonged exposure to moisture, is a significant problem for cedar siding. You’ll typically see this as soft, spongy wood that may crumble easily. The color might be darker than the surrounding undamaged wood, and you might even see fungal growth. Repair involves removing the affected section completely, down to the sound wood. This usually requires careful chisel work and possibly a saw. Once the rot is removed, a replacement piece of cedar, ideally pressure-treated for added protection, is carefully fitted and secured with exterior-grade screws. The new piece is then primed and painted to match the existing siding.
Imagine a section of siding near the ground, where water tends to splash. Before repair, this area is noticeably darker and softer to the touch than the rest of the siding. Pieces of the wood easily flake off when touched. After repair, the replacement piece is seamlessly integrated, matching the color and texture of the surrounding siding. The repaired area is indistinguishable from the rest, blending in perfectly after the paint is applied.
Insect Damage to Cedar Siding
Insect infestation, particularly from carpenter ants or termites, can cause significant structural damage. Evidence of insect damage might include small holes, tunnels, or frass (insect droppings). You may also notice weakened sections of the siding that sound hollow when tapped. Repair for insect damage is more involved. It usually requires a thorough inspection to determine the extent of the infestation. Infested areas must be removed, and any remaining insects treated with insecticide. Replacement sections are then fitted and secured, much like in rot repair. It’s crucial to address the underlying infestation to prevent further damage.
Consider a section of siding on a sunny wall, where small holes are visible. These holes aren’t necessarily indicative of rot, but rather tunnels made by wood-boring insects. Before repair, the affected area appears slightly weakened and may have small piles of sawdust underneath. After the affected area is removed and replaced with new cedar siding, the holes are gone, and the repaired section blends seamlessly with the surrounding siding once painted.
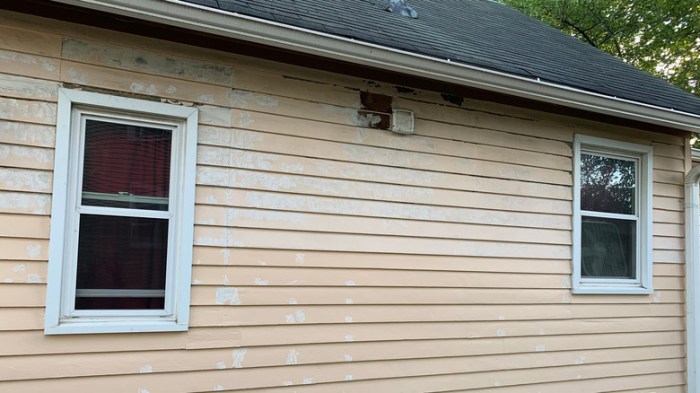
Water Damaged Cedar Siding
Water damage often manifests as discoloration, swelling, or warping of the cedar siding. Prolonged exposure to moisture can lead to both rot and warping, often seen as buckling or unevenness in the siding. Repair involves removing the damaged sections and replacing them with new cedar. However, addressing the source of the water damage is crucial to prevent future problems. This might involve repairing leaky gutters, improving drainage, or addressing foundation issues.
Picture a section of siding near a downspout, where water consistently splashes against the surface. Before repair, the siding is noticeably warped and swollen, with raised areas and discoloration. After the damaged sections are replaced and the drainage is improved, the siding is smooth and straight again, with the repaired areas blending seamlessly after painting. The overall appearance is much improved.
Visual Differences Between Correctly and Incorrectly Applied Paint
Correctly applied paint on cedar siding creates a smooth, even finish that enhances the natural beauty of the wood. The paint adheres well, providing long-lasting protection against the elements. Incorrectly applied paint, however, may appear patchy, uneven, or show brush strokes. It might peel or chip prematurely, leaving the wood exposed to damage. A poorly prepared surface can lead to paint adhesion problems, resulting in a less attractive and less protective finish.
Imagine two adjacent sections of cedar siding, both painted. One is smoothly painted, with a consistent sheen and color. The other exhibits uneven coverage, brush marks are visible, and the color is inconsistent. The latter section will not only look less appealing but will also be more susceptible to weather damage, requiring repainting much sooner than the correctly painted section.
Conclusion
Source: platinumexteriorsnw.com
Revitalizing your cedar siding through repair and painting is a rewarding project that enhances your home’s beauty and longevity. By following the steps Artikel in this guide, from choosing the right contractor to employing proper painting techniques, you can achieve professional results. Remember, preventative maintenance is key to extending the life of your siding, so regular cleaning and inspections are crucial. With a little effort, your home’s exterior will shine for years to come!
Detailed FAQs: Cedar Siding Repair And Painting Near Me
What type of wood filler is best for cedar siding?
Exterior-grade wood filler designed for use on wood siding is recommended. Look for a paintable formula that matches the color of your siding as closely as possible.
How often should I clean my cedar siding?
At least once a year, preferably in the spring or fall, use a pressure washer (low-pressure setting) or a garden hose with a soft brush.
Can I paint the cedar siding myself?
Yes, but proper preparation and technique are crucial for a long-lasting, professional finish. If you’re unsure, hiring a professional is always an option.
How long does cedar siding paint last?
The lifespan of cedar siding paint varies depending on the quality of the paint, weather conditions, and the amount of sun exposure. Expect 5-10 years on average with proper preparation and application.
What are the signs of water damage in cedar siding?
Look for discoloration, swelling, soft spots, or cracks in the wood. Mold or mildew growth is another clear indication of water damage.