Cedar Siding Replacement A Complete Guide
Cedar siding replacement is a significant home improvement project that can dramatically enhance your home’s curb appeal and longevity. This guide breaks down everything you need to know, from understanding the costs and choosing the right cedar to the installation process and long-term maintenance. We’ll cover material selection, step-by-step installation, and even environmental considerations to help you make informed decisions throughout your project.
Whether you’re a seasoned DIYer or hiring a contractor, understanding the nuances of cedar siding replacement is key to a successful outcome. We’ll explore the various types of cedar, their pros and cons, and how to choose the best option for your home and budget. Get ready to transform your home’s exterior!
Cost Analysis of Cedar Siding Replacement

Source: eavestroughandsiding.com
Replacing your home’s cedar siding is a significant investment, and understanding the associated costs is crucial for budgeting and planning. This section breaks down the typical expenses involved, helping you create a realistic budget for your project.
Cedar Siding Replacement Cost Breakdown
The total cost of cedar siding replacement varies considerably depending on several factors. A detailed breakdown helps to illustrate these variables and their impact on the final price. The following table provides a general estimate; actual costs may differ based on your specific circumstances.
| Item | Cost per Square Foot | Total Cost (Estimate) | Notes/Considerations |
|---|---|---|---|
| Materials (Cedar Siding) | $3 – $15 | $3000 – $15000 (for a 1000 sq ft house) | Cost varies greatly depending on the type of cedar (clear, knotty, etc.), grade, thickness, and supplier. Higher grades and clearer cedar will be more expensive. |
| Labor | $5 – $15 | $5000 – $15000 (for a 1000 sq ft house) | Labor costs depend on the complexity of the job, the experience of the contractor, and regional labor rates. Removal of old siding can add to labor costs. |
| Permits | $1 – $5 per square foot | $1000 – $5000 (for a 1000 sq ft house) | Permit costs vary widely by location and the scope of the project. Check with your local building department for specific requirements and fees. |
| Waste Removal | $1 – $3 | $1000 – $3000 (for a 1000 sq ft house) | Proper disposal of old siding is essential and adds to the overall cost. |
| Other (e.g., Flashing, Trim) | $2 – $8 | $2000 – $8000 (for a 1000 sq ft house) | Additional materials and labor for flashing, trim, and other finishing details. |
| Total Estimated Cost | $12 – $46 | $11,000 – $46,000 (for a 1000 sq ft house) | This is a broad range. Actual costs will depend on the factors discussed below. |
Factors Influencing Overall Cost
Several key factors significantly influence the final cost of a cedar siding replacement project. Understanding these factors allows for better budgeting and realistic expectations.
The size of the house is a primary driver of cost. Larger houses naturally require more materials and labor, resulting in a higher overall price. For example, a 2000 sq ft house will cost approximately double the estimated cost of a 1000 sq ft house, assuming all other factors remain consistent.
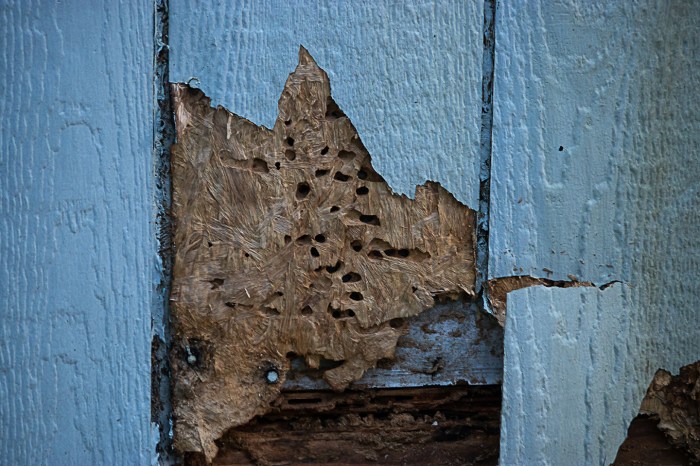
The condition of the existing siding affects the labor involved. If the old siding is difficult to remove or requires extensive repairs to the underlying structure, labor costs will increase. For instance, if significant rot or water damage is present, additional time and materials will be needed for repairs before new siding can be installed.
The type of cedar chosen impacts the material cost. Clear cedar, with minimal knots, is typically more expensive than knotty cedar. Different grades of cedar also influence the price, with higher grades commanding higher costs. For example, a premium-grade clear cedar might cost twice as much per square foot as a lower-grade knotty cedar.
Materials and Sourcing for Cedar Siding Replacement
Choosing the right cedar siding and sourcing it from a reputable supplier is crucial for a successful and long-lasting siding replacement project. The type of cedar you select, its quality, and its moisture content will significantly impact the final look and lifespan of your home’s exterior. This section details the various types of cedar siding available and guides on selecting high-quality materials.
Choosing the right cedar siding involves understanding the different types available and their properties. Each type offers a unique combination of durability, appearance, and maintenance requirements. The longevity of your siding is directly tied to the quality of the materials used.
Types of Cedar Siding and Their Characteristics
Cedar siding comes in several profiles, each offering distinct aesthetic and performance qualities. Selecting the right profile depends on your home’s architectural style and your personal preferences.
- Bevel Siding: This classic profile features a slightly tapered edge, creating a shadow line that adds depth and texture. Bevel siding is relatively easy to install and is a popular choice for its versatility.
- Channel Siding: Similar to bevel siding, channel siding has a more pronounced channel, offering a more defined shadow line and a slightly more rustic appearance. It’s known for its durability and weather resistance.
- Shiplap Siding: Characterized by its overlapping boards with a smooth, flat surface, shiplap siding provides a clean, modern look. It’s less prone to warping than other types of cedar siding.
- Shingle Siding: These individual pieces are stacked to create a textured, layered look. Cedar shingles offer a more rustic and traditional aesthetic and are highly durable.
Importance of Sourcing High-Quality Cedar Siding
Sourcing high-quality cedar siding is paramount for ensuring the longevity and performance of your new siding. Lower-quality cedar may contain knots, cracks, or other imperfections that can compromise its durability and lead to premature deterioration. High-quality cedar is typically graded according to its knot density and overall appearance. Investing in premium-grade cedar will result in a more attractive and longer-lasting exterior. For instance, a home sided with high-grade cedar might require less maintenance over 20 years compared to one using lower-grade materials, potentially saving on long-term costs.
Cedar Siding Selection Checklist
Careful consideration of several factors is crucial before purchasing cedar siding. This checklist helps ensure you choose materials that meet your needs and budget.
- Grade: Select a grade appropriate for your needs and budget. Higher grades generally mean fewer knots and imperfections. Common grades include Premium, Clear, and Standard.
- Moisture Content: Cedar siding should have a moisture content of 15% or less to prevent warping and shrinking. Check the moisture content before installation.
- Species: Western Red Cedar and Eastern White Cedar are the most common choices. Western Red Cedar is generally more resistant to decay and insects.
- Treatment: Consider pre-treated cedar siding for added protection against insects and decay. This can extend the lifespan of your siding significantly.
- Supplier Reputation: Choose a reputable supplier with a proven track record of providing high-quality materials and excellent customer service. Check reviews and seek recommendations.
- Visual Inspection: Always inspect the siding before installation to ensure it meets your expectations in terms of quality and appearance.
The Replacement Process
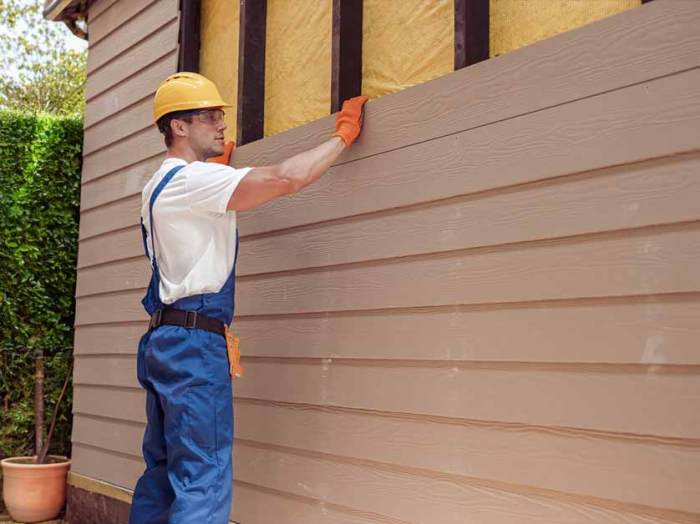
Replacing cedar siding is a significant undertaking, but with careful planning and execution, you can achieve a beautiful and long-lasting result. This step-by-step guide will walk you through the process, from initial assessment to final cleanup, ensuring a professional finish. Remember safety first! Always wear appropriate safety gear, including eye protection, gloves, and a dust mask.
Initial Assessment and Preparation
Before starting any demolition, a thorough assessment of the existing siding is crucial. This involves identifying the extent of damage, checking for rot or insect infestation, and determining the type and condition of the underlying sheathing. You’ll need to measure the area requiring replacement to accurately estimate material needs. Tools for this stage include a measuring tape, a level, and possibly a moisture meter to check for rot. Note any areas requiring additional attention, such as damaged flashing or trim.
Removal of Existing Siding
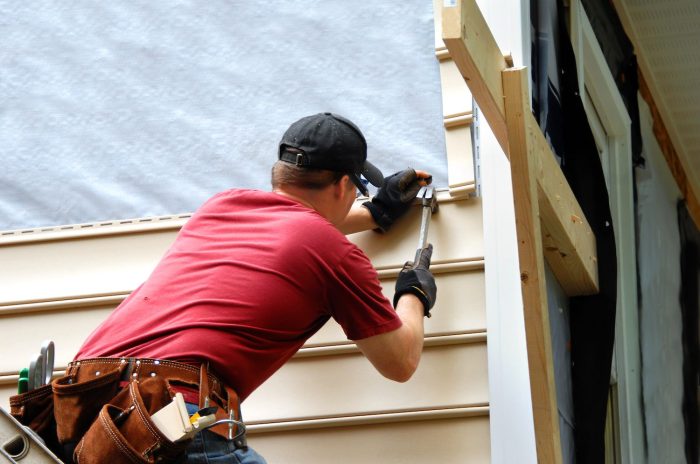
Carefully remove the old cedar siding, starting from the top and working your way down. Use a pry bar to gently loosen the siding boards, taking care not to damage the underlying sheathing. Dispose of the old siding responsibly, following local regulations for waste disposal. Essential tools for this phase are a pry bar, hammer, safety glasses, and work gloves. The best practice is to number or mark each board as you remove it, in case you decide to reuse some of it.
Sheathing Inspection and Repair
Once the old siding is removed, thoroughly inspect the underlying sheathing for damage. Replace any rotted or damaged sections with new sheathing material. Secure the sheathing with appropriate nails or screws. Tools needed include a hammer, nails or screws, a saw, and possibly a replacement sheet of plywood or OSB. Ensure the sheathing is level and plumb for a proper siding installation.
Installation of New Cedar Siding
Begin installing the new cedar siding, starting from the bottom and working your way up. Ensure each board is properly aligned and secured with appropriate nails or screws. Leave the recommended expansion gap between boards to allow for natural movement due to weather changes. Tools include a nail gun (optional, but highly recommended for efficiency), hammer, nails or screws, level, and measuring tape. Pre-drilling pilot holes before nailing can help prevent splitting the cedar.
Caulking and Finishing
After installing the new siding, caulk all seams and gaps to prevent water penetration. This is crucial for the longevity of your siding. Apply a high-quality exterior-grade caulk using a caulking gun. Finally, install any necessary trim, such as corner boards or window casings. Tools include a caulking gun, exterior-grade caulk, and appropriate trim pieces. Choose a caulk color that blends seamlessly with your cedar siding.
Final Cleanup
Once the installation is complete, clean up any debris and dispose of it properly. Sweep the area and remove any stray nails or screws. This ensures a professional and safe finish to the project. Tools for this phase include a broom, dustpan, and possibly a shop vacuum for finer debris. A final inspection will help identify any missed details before considering the project complete.
Maintenance and Longevity of Cedar Siding
Cedar siding, with its natural beauty and durability, requires proper care to maintain its aesthetic appeal and extend its lifespan. Regular maintenance not only enhances the curb appeal of your home but also prevents costly repairs down the line. Neglecting maintenance can lead to premature deterioration, necessitating more extensive and expensive repairs or even complete replacement.
Cedar Siding Maintenance Schedule
A proactive maintenance schedule is key to preserving your cedar siding. This involves a combination of cleaning, staining, and sealing, performed at appropriate intervals depending on your climate and exposure conditions. A typical schedule might look like this but always adjust based on your specific environment and the condition of your siding.
Annual Inspection: Spring is the ideal time for a thorough inspection. Check for any signs of damage, such as cracks, rot, insect infestation, or loose boards. Address minor issues promptly to prevent them from escalating.
Cleaning (Every 1-2 years): Use a soft-bristled brush and a gentle cleaning solution (mild soap and water) to remove dirt, mildew, and cobwebs. Power washing can be effective but use caution to avoid damaging the wood. Always rinse thoroughly after cleaning.
Staining and Sealing (Every 3-5 years): Staining protects the wood from UV damage and moisture, while sealing helps prevent water penetration. The frequency depends on the type of stain and sealant used, as well as the climate. Follow the manufacturer’s instructions carefully for best results.
Common Problems and Solutions for Cedar Siding
Addressing issues promptly prevents minor problems from becoming major headaches. Here’s a table summarizing common problems and their solutions:
| Problem | Solution |
|---|---|
| Mildew and Mold Growth | Clean with a solution of bleach and water (follow safety precautions), then rinse thoroughly. For persistent growth, consider a mildewcide. |
| Cracked or Split Siding | Repair minor cracks with wood filler. For larger cracks or splits, replace the damaged board. |
| Insect Infestation | Identify the insect and use appropriate insecticide or pest control methods. Consult a pest control professional for severe infestations. |
| Rotting Wood | Replace any severely rotted boards. Address underlying moisture issues to prevent further rot. |
| Peeling Paint or Stain | Scrape off loose paint or stain before applying a new coat. Ensure the surface is clean and dry before applying the new finish. |
Extending the Lifespan of Cedar Siding Through Proper Maintenance
Proper maintenance significantly extends the lifespan of cedar siding. By following a regular cleaning and treatment schedule, you prevent damage from moisture, UV rays, and pests. Addressing problems promptly prevents minor issues from escalating into costly repairs. For instance, a homeowner who regularly cleans their siding and addresses minor cracks promptly might extend the life of their siding by 10-15 years compared to a homeowner who neglects maintenance. This translates to significant cost savings in the long run, avoiding premature replacement. Regular inspection allows for early detection of problems, enabling timely intervention and minimizing the extent of repairs. A proactive approach to maintenance is far more cost-effective than reactive repairs.
Environmental Considerations of Cedar Siding

Source: elitehomeexteriorsnw.com
Choosing cedar siding involves considering its environmental impact throughout its lifecycle, from harvesting to disposal. Sustainable sourcing and responsible disposal methods are crucial for minimizing the negative effects on the environment. This section will explore these aspects and compare cedar to alternative siding materials.
Cedar siding, like any natural material, has an environmental footprint. The harvesting process can impact forest ecosystems, potentially leading to habitat loss or soil erosion if not managed responsibly. Manufacturing cedar siding also consumes energy and resources. However, cedar is a renewable resource, and when harvested sustainably, it can be a relatively environmentally friendly option compared to some alternatives. The longevity of cedar siding also reduces the frequency of replacements, lessening the overall environmental impact over time.
Sustainable Sourcing of Cedar, Cedar siding replacement
Responsible sourcing of cedar is paramount for minimizing environmental damage. Look for certifications like the Forest Stewardship Council (FSC) label, which ensures that the wood comes from forests managed according to strict environmental and social standards. These certifications guarantee sustainable harvesting practices, promoting forest health and biodiversity. Choosing cedar from local sources can also reduce transportation emissions and support local economies. In contrast, cedar sourced from unsustainable logging operations contributes to deforestation and habitat destruction, undermining the environmental benefits of the material. For example, purchasing FSC-certified cedar siding from a local supplier reduces carbon emissions associated with long-distance transportation compared to sourcing from across the country or internationally.
Cedar Siding Disposal and Recycling
At the end of its lifespan, cedar siding can be disposed of in several ways. Recycling options exist, with some companies accepting cedar wood for repurposing into other products. Landfilling is another option, but it’s less environmentally friendly due to the decomposition process and potential methane emissions. Composting is also possible, though it requires specific conditions to break down the wood effectively. Ideally, cedar siding should be reused or recycled whenever possible to reduce waste and conserve resources. For instance, reclaimed cedar siding from demolition projects can be a sustainable alternative to newly harvested wood. The decision on disposal methods should prioritize recycling and reuse over landfilling or incineration.
Cedar Siding vs. Alternative Materials
Comparing cedar siding to other materials reveals different environmental impacts. Vinyl siding, for example, is a petroleum-based product with a significant carbon footprint during its manufacturing. It’s also not biodegradable and contributes to landfill waste. Metal siding, while durable and recyclable, requires significant energy for production. Fiber cement siding has a lower carbon footprint than vinyl but involves the use of cement, a resource-intensive material. The environmental impact of each material depends on various factors including production methods, transportation distances, and disposal practices. A comprehensive life cycle assessment can help in making informed decisions. For instance, a comparison between cedar siding sourced sustainably and manufactured locally versus vinyl siding transported long distances highlights the differences in transportation-related emissions.
Resources for Environmentally Responsible Cedar Siding
Several organizations provide resources and certifications to help consumers make environmentally conscious choices. The Forest Stewardship Council (FSC) website offers a database of certified products and suppliers. Local lumberyards and building supply stores can also provide information on sustainably sourced cedar siding. Consultants specializing in sustainable building practices can offer guidance on selecting and using environmentally friendly materials. Additionally, searching for “sustainable cedar siding” online will yield numerous resources and articles on environmentally responsible sourcing and disposal practices.
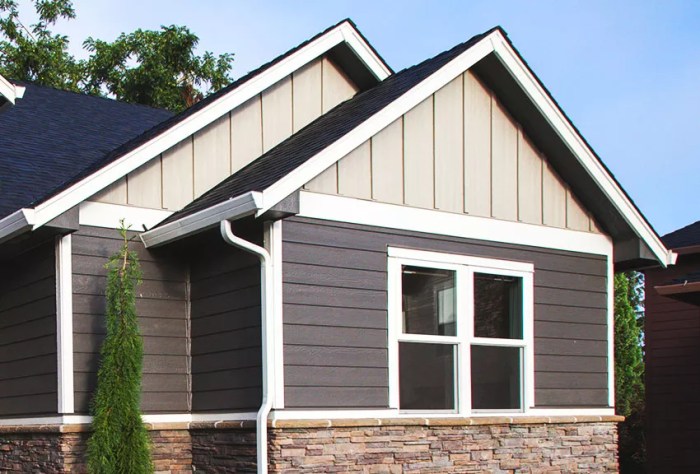
Visual Examples of Cedar Siding Replacement Projects
Seeing is believing, and when it comes to cedar siding, the visual transformation can be dramatic. These examples showcase the impact of different cedar types, colors, and textures on the overall aesthetic of a home. Each project highlights the potential for enhancing curb appeal and property value through thoughtful siding selection and skilled installation.
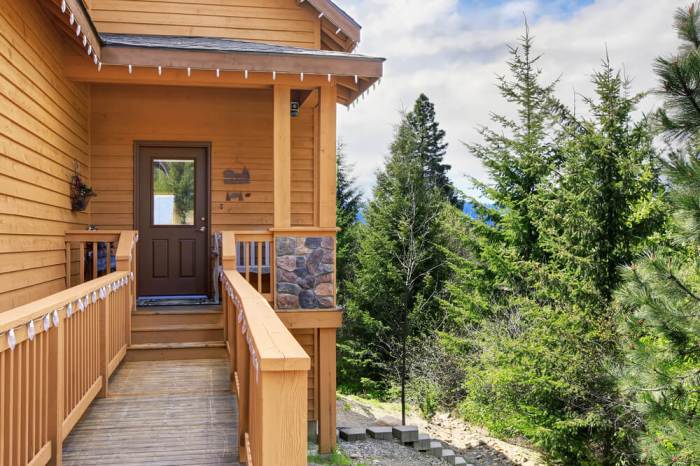
Project 1: Rustic Charm with Western Red Cedar
This project involved replacing the aging vinyl siding of a 1950s ranch-style home with Western Red Cedar. The before state showed a rather bland, dated exterior. The chosen cedar was a natural, untreated grade, allowing the wood’s rich reddish-brown tones and natural variations in grain to shine through. The design incorporated vertical siding for a classic, clean look. The afterstate reveals a home imbued with rustic charm. The warm, natural tones of the cedar complement the home’s architecture beautifully, creating a welcoming and inviting atmosphere. The texture of the cedar, slightly rough and subtly varied, adds depth and visual interest, significantly enhancing the home’s curb appeal. The overall aesthetic is one of relaxed sophistication, blending seamlessly with the surrounding landscape.
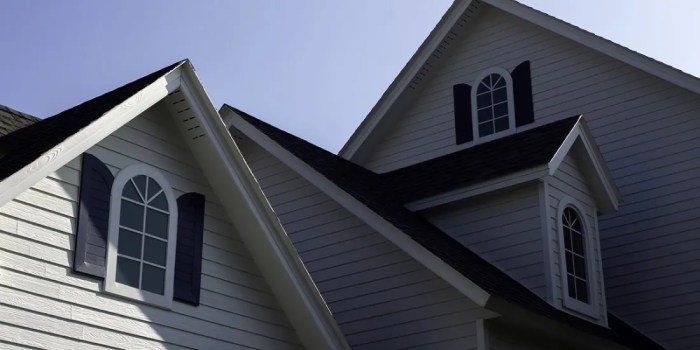
Project 2: Modern Elegance with Clear Grade Eastern White Cedar
In contrast to the first project, this renovation featured a contemporary home with previously painted aluminum siding. The before image depicts a somewhat stark and impersonal exterior. The homeowner opted for Clear Grade Eastern White Cedar, known for its consistent light color and tight grain. The siding was installed horizontally, emphasizing the home’s clean lines and modern design. The after-state showcases a dramatic improvement. The pale, almost white color of the cedar provides a fresh, bright, and airy feel, perfectly complementing the home’s sleek architecture. The smooth, uniform texture of the clear-grade cedar contributes to the modern aesthetic. The overall visual effect is one of understated elegance and sophisticated simplicity. The lack of pronounced grain creates a calm, uncluttered appearance.
Project 3: Coastal Cottage Style with Knotty Cedar
This project involved a charming coastal cottage with weathered clapboard siding. The before state showed a somewhat worn and faded exterior. The homeowners chose knotty cedar for its rustic charm and character. The knots and variations in color, ranging from light tan to deep brown, contribute to the home’s unique personality. The siding was installed in a traditional lap style. The afterimage reveals a complete transformation. The knotty cedar gives the cottage a cozy, lived-in feel, perfectly suited to its coastal location. The varied textures and colors create a visually rich and interesting surface. The overall aesthetic is one of charming informality and relaxed coastal elegance. The natural imperfections of the knotty cedar add a touch of warmth and authenticity, creating a truly inviting home.
Final Wrap-Up: Cedar Siding Replacement

Source: ddsrpc.com
Replacing your cedar siding is a worthwhile investment that can significantly increase your home’s value and aesthetic appeal. By carefully considering the factors AArtikelin in this guide – from cost analysis and material selection to installation and maintenance – you can ensure a successful project that lasts for years to come. Remember to prioritize quality materials, proper installation techniques, and a proactive maintenance schedule to maximize the lifespan and beauty of your new cedar siding.
Questions and Answers
Can I replace the dar siding myself?
While possible for smaller areas, replacing cedar siding is a labor-intensive project best suited for experienced DIYers. For larger homes or complex designs, hiring a professional is recommended.
How long does cedar siding last?
With proper maintenance, cedar siding can last 20-30 years or even longer. Factors like climate, maintenance, and the quality of the cedar itself influence lifespan.
What’s the best time of year to replace cedar siding?
Spring and fall are generally ideal, as these seasons offer moderate temperatures and less chance of extreme weather interfering with the installation process.
How do I dispose of old cedar siding responsibly?
Check with your local waste management facility for guidelines on disposing of old siding. Some facilities may accept it for recycling or composting, while others may require it to be disposed of in a landfill.
What are the warranty options for cedar siding?
Warranty options vary greatly depending on the manufacturer and type of cedar. Always check the manufacturer’s warranty information before purchasing.