Hardie Board Replacement A Complete Guide
Hardie board replacement might sound daunting, but it’s a manageable project with the right information. This guide breaks down the process step-by-step, from identifying damage and assessing the need for replacement to choosing the right materials and completing the installation. We’ll cover everything from understanding different Hardie board types and their lifespans to budgeting for the project and preventing future damage. Get ready to tackle your Hardie board replacement with confidence!
We’ll explore common causes of Hardie board failure, like moisture damage and impact, and how to spot signs of trouble. Learn how to choose the best replacement boards for your climate and budget, and master the techniques for a professional-looking installation. We’ll even cover essential maintenance tips to keep your new Hardie board looking great for years to come. Let’s get started!
Understanding Hardie Board Failure
Hardie board, a popular choice for siding and trim, offers durability and longevity. However, like any building material, it’s susceptible to damage and deterioration over time. Understanding the common causes of failure can help homeowners anticipate and address potential problems, extending the lifespan of their Hardie board installation. This section will explore the factors influencing the Hardie board’s performance and lifespan.
Common Causes of Hardie Board Damage, Hardie Board Replacement
Several factors contribute to the degradation of the Hardie board. Moisture is a primary culprit, leading to issues like swelling, cracking, and the growth of mold and mildew. Improper installation, such as inadequate flashing or caulking, can create pathways for water to penetrate the board. Exposure to extreme temperature fluctuations can cause expansion and contraction, leading to cracking and weakening of the material. Physical damage from impacts, such as hail or flying debris, can also compromise the integrity of the Hardie board. Finally, neglecting regular maintenance, including cleaning and repainting, accelerates deterioration.
Hardie Board Types and Susceptibility to Damage
Hardie board comes in various types, each with different properties and varying degrees of susceptibility to damage. While all types are designed to be durable, their performance can vary based on their composition and intended application. For example, HardiePlank lap siding is designed to withstand harsh weather conditions, while HardieTrim boards, being thinner, might be more vulnerable to impact damage. The specific fiber cement formulation also influences its resistance to moisture and temperature changes. Differences in thickness and density also affect the overall durability and resistance to damage.
Hardie Board Lifespan and Environmental Conditions
The lifespan of the Hardie board is significantly influenced by environmental factors. In milder climates with moderate rainfall and temperature variations, the Hardie board can last for decades with proper maintenance. However, in harsh coastal environments with high salinity and constant exposure to wind and rain, the lifespan may be shortened. Areas experiencing extreme temperature swings, frequent freeze-thaw cycles, or heavy snowfall can also accelerate deterioration. For example, a Hardie board installation in a desert climate might experience more rapid fading due to intense sun exposure compared to a similar installation in a humid, shaded environment.
Common Hardie Board Problems and Causes
| Problem | Cause | Problem | Cause |
|---|---|---|---|
| Cracking | Improper installation, temperature fluctuations, impact damage | Swelling | Moisture penetration, inadequate sealing |
| Mold/Mildew | Moisture retention, lack of ventilation | Fading | UV exposure, lack of paint maintenance |
| Delamination | Moisture intrusion, manufacturing defect | Nail pops | Improper nailing technique, expansion/contraction |
Assessing the Need for Replacement
Knowing when to replace your Hardie board siding is crucial for maintaining your home’s curb appeal and structural integrity. Ignoring signs of damage can lead to more extensive (and expensive) repairs down the line. In this section Artikels how to assess the need for Hardie board replacement, focusing on visual indicators, damage assessment, and the importance of professional consultation.
Identifying visual indicators of Hardie board failure is the first step. Many problems are easily spotted with a careful visual inspection.
Visual Indicators of Hardie Board Damage
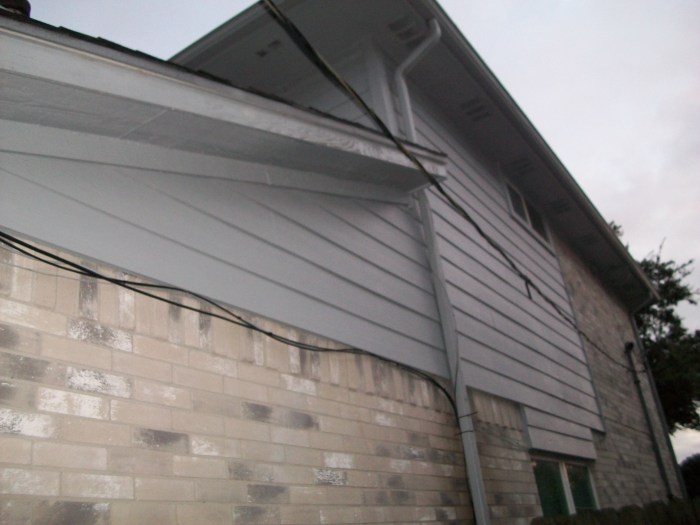
Damaged Hardie board often displays visible signs of deterioration. Look for cracks, especially around fasteners or joints. These cracks can be hairline fractures or larger separations. Check for dents, gouges, or other physical damage caused by impacts or weather events. Also, pay close attention to areas of discoloration or staining, which may indicate moisture penetration and potential rot behind the siding. Significant warping or buckling of the boards is another clear sign that replacement is needed. Finally, inspect for signs of pest infestation, such as holes or tunnels in the board itself.
Determining the Extent of Damage
Once you’ve identified potential problems, it’s important to determine how widespread the damage is. A small crack might be easily repaired, but extensive damage across multiple boards usually necessitates full replacement. Gently probe any cracks or damaged areas with a small, flat tool to check for deeper damage or rot beneath the surface. If the board feels soft or spongy, it’s likely severely compromised and needs replacing. Measuring the affected area provides a better understanding of the scale of the problem and helps in estimating replacement costs. For example, a single damaged board near a window is a smaller job than significant damage across an entire wall.
Inspecting for Underlying Structural Issues
While assessing the Hardie board itself is important, it’s equally crucial to inspect for underlying structural problems. Water damage to the Hardie board can often indicate a problem with the sheathing or even the framing beneath. Look for signs of water damage on the sheathing, such as discoloration or rot. If the sheathing is damaged, you’ll likely need to repair or replace it before installing a new Hardie board. This might involve inspecting the house wrap for tears or gaps, which would allow moisture to penetrate the wall assembly. Additionally, check for any signs of structural movement in the framing, such as sagging or bowing, which could be contributing to the Hardie board damage.
Importance of Professional Assessment
While a thorough DIY inspection can identify many issues, a professional assessment is highly recommended before undertaking Hardie board replacement. A qualified contractor can accurately assess the extent of the damage, identify any hidden problems, and provide an accurate estimate for the repair or replacement work. They have the expertise to determine if underlying structural issues need to be addressed and can advise on the best course of action to ensure a long-lasting and structurally sound repair. This prevents costly mistakes and ensures the job is done correctly and safely.
Replacement Process and Techniques
Replacing Hardie board siding is a multi-step process that requires careful attention to detail. Proper technique ensures a long-lasting, weather-resistant exterior. This section Illustrates the steps involved in removing damaged siding and installing a new Hardie board, along with a comparison of installation methods and a checklist of necessary tools and materials.
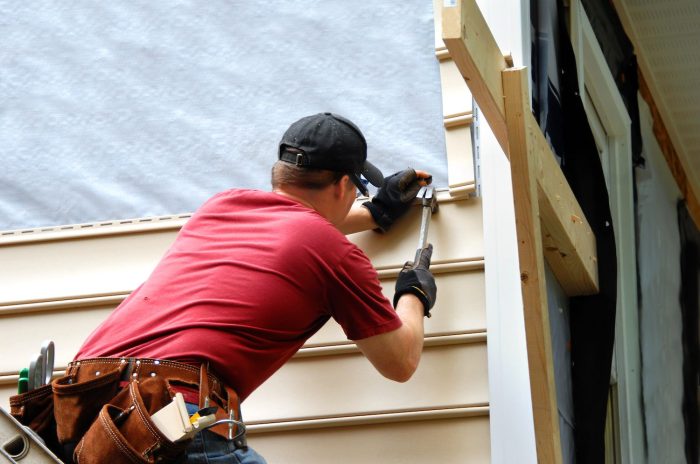
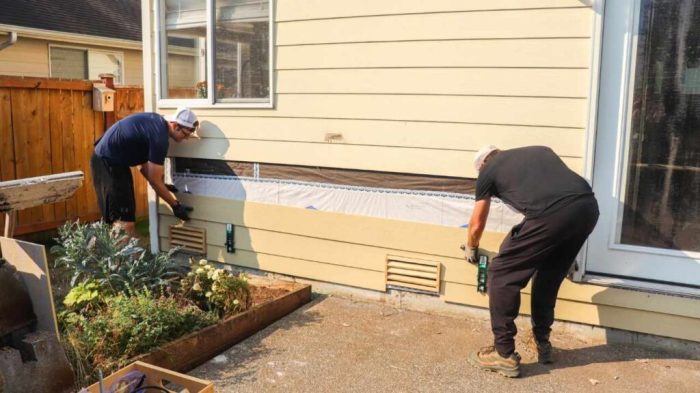
Removing Damaged Hardie Board
Begin by carefully assessing the extent of the damage. Remove any loose or damaged siding sections. For larger areas, you might need to remove several pieces to ensure a clean, consistent repair. Use a pry bar to carefully separate the siding from the underlying sheathing, working slowly to avoid damaging the surrounding area. Always wear appropriate safety gear, including gloves and eye protection. Dispose of the removed Hardie board responsibly according to local regulations. Remember to take pictures before you begin to aid in matching the replacement pieces.
Installing New Hardie Board
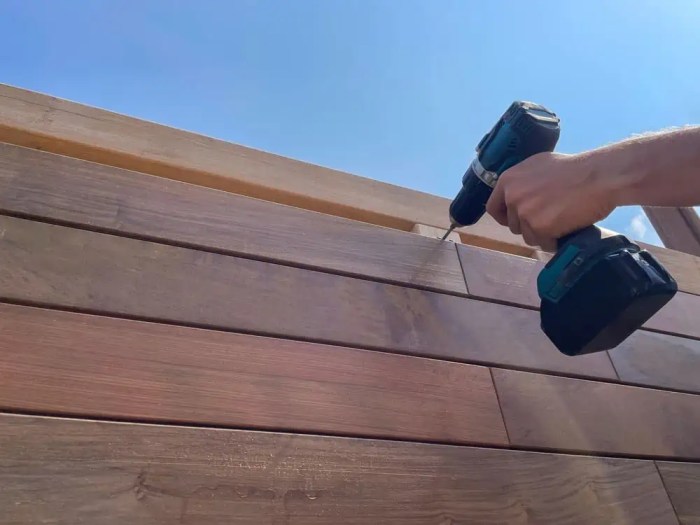
Installing a new Hardie board involves several key steps. First, ensure the underlying sheathing is sound and properly prepared. Any damaged sheathing should be repaired or replaced before installing new siding. Next, begin installation at a corner or a pre-determined starting point. Secure the first piece of Hardie board using galvanized nails, spaced appropriately according to the manufacturer’s instructions. Maintain consistent spacing and nail placement to prevent warping or buckling. Overlap subsequent pieces, ensuring a tight fit and proper alignment. Use a caulking gun to apply a weather-resistant sealant to all seams and joints to prevent moisture penetration. Finish by installing trim and any necessary accessories. Always follow the manufacturer’s specific instructions for installation.
Installation Methods Comparison
There are several methods for installing Hardie board, each with its advantages and disadvantages. The most common methods include horizontal and vertical installation. Horizontal installation is generally easier for larger areas and provides a more traditional look. Vertical installation can create a more modern aesthetic and can sometimes be more effective in managing water runoff, depending on the climate and building design. The choice of method depends on the specific project requirements and aesthetic preferences. Both methods require careful planning and execution to ensure a proper and lasting installation.
Necessary Tools and Materials Checklist
Proper preparation is crucial for a successful Hardie board replacement. Having all the necessary tools and materials readily available will streamline the process.
- Pry bar
- Hammer
- Galvanized nails
- Caulk gun and weather-resistant sealant
- Measuring tape
- Safety glasses
- Work gloves
- Circular saw (or other appropriate cutting tool)
- Level
- New Hardie board siding
- Replacement fasteners (if needed)
- Utility knife
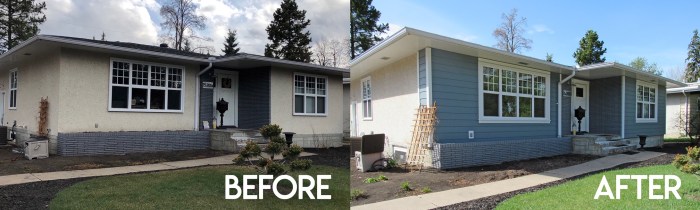
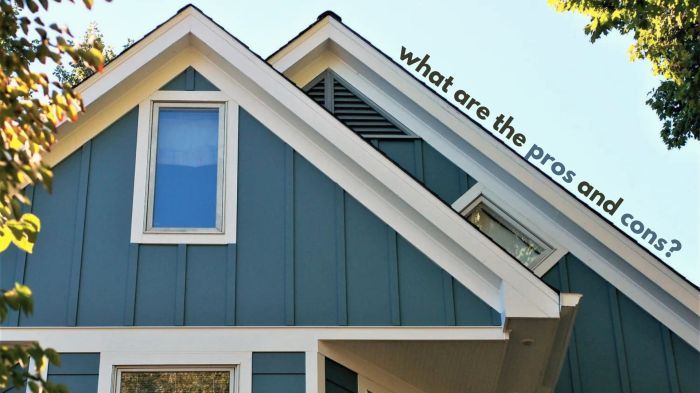
Material Selection and Considerations
Source: fmfconstruction.com
Choosing the right Hardie board is crucial for a long-lasting and aesthetically pleasing exterior. Several factors influence this decision, including budget, climate, and desired aesthetic. Understanding the differences between the available options will help you make an informed choice.
Hardie board comes in a variety of types, each with its strengths and weaknesses. The primary differences lie in their composition and resulting properties, which affect both cost and longevity. Let’s explore these variations.
Hardie Board Types and Properties
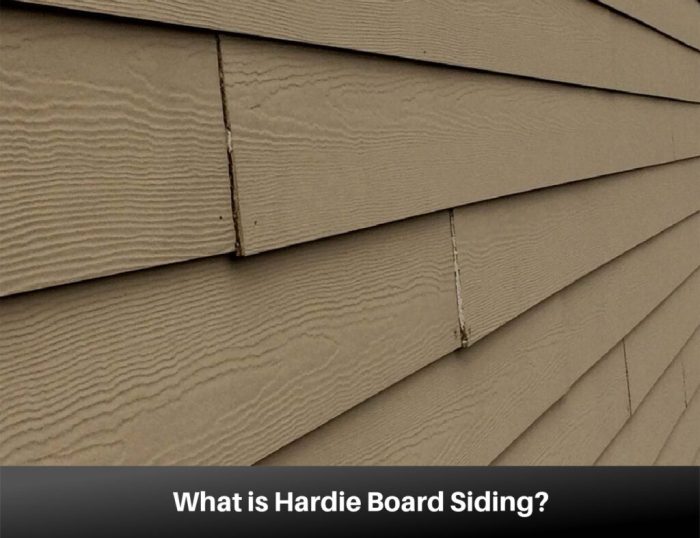
HardiePlank lap siding, HardieShingle siding, HardiePanel vertical siding, and HardieTrim are the most common types. HardiePlank is a popular choice for its versatility and classic look, mimicking traditional wood siding. HardieShingle offers a more textured, rustic appearance, while HardiePanel provides a clean, modern aesthetic with its large, vertical panels. HardieTrim is used for finishing details, such as window and door casings. Each product is engineered for specific applications and has slightly different properties in terms of thickness, texture, and color options. For example, HardieShingle is designed to withstand high winds and is often thicker than HardiePlank.
Cost and Durability Comparison
Generally, the cost of a Hardie board varies depending on the type, thickness, and finish. HardiePlank, being a widely used product, tends to be more readily available and competitively priced. Specialized products like HardieShingle, due to their more complex manufacturing process and unique texture, may command a slightly higher price. However, the increased durability often justifies the higher initial cost, as these products are engineered to withstand harsher weather conditions and require less frequent maintenance, leading to long-term cost savings. For instance, a thicker Hardie board might cost more upfront but could potentially last longer, reducing the need for premature replacements.
Hardie Board Selection for Specific Climates
Climate plays a significant role in material selection. In areas with heavy rainfall and humidity, a board with superior moisture resistance is essential to prevent rot and damage. Conversely, in regions prone to extreme temperature fluctuations, a product with high thermal stability is crucial to minimize expansion and contraction. For example, in coastal areas subject to salt spray, a fiber cement board with enhanced corrosion resistance is recommended. In arid climates, where sun exposure is intense, a lighter color might help to reflect heat and reduce the risk of fading.
Benefits and Drawbacks of Hardie Board Types
The following table summarizes the benefits and drawbacks of common Hardie board types. Remember that individual experiences may vary based on installation and maintenance practices.
| Hardie Board Type | Benefits | Drawbacks |
|---|---|---|
| HardiePlank | Versatile, classic look, relatively affordable | Can be susceptible to damage from impact if not installed correctly |
| HardieShingle | Durable, resists high winds, attractive rustic appearance | Higher initial cost compared to HardiePlank |
| HardiePanel | Modern aesthetic, large panels for faster installation | May show imperfections more readily than lap siding |
| HardieTrim | Specifically designed for trim, durable, and weather-resistant | Limited applications, higher cost per unit due to smaller size |
Cost Estimation and Budgeting: Hardie Board Replacement
Source: homedit.com
Replacing Hardie board siding is a significant investment, so careful budgeting is crucial. Accurate cost estimation involves considering several key factors, allowing you to plan effectively and avoid unexpected expenses. This section will guide you through the process of estimating the cost of your Hardie board replacement project.
The total cost of Hardie board replacement is influenced by several variables. The most significant factor is the square footage of the area needing replacement. Beyond that, material choices (e.g., different Hardie board types, colors, and finishes), labor costs, and any necessary permits will all impact the final price. Let’s explore each of these elements in detail.
Material Costs
Material costs are directly tied to the size of your project and your material choices. Hardie board comes in various types, each with a different price point. For example, HardiePlank lap siding is generally less expensive than HardieShingle siding. The color you choose might also influence cost, with some colors being more expensive than others. Additionally, you’ll need to factor in the cost of fasteners, primers, and paint or stain. To estimate material costs, start by calculating the total square footage of the area requiring replacement. Then, obtain price quotes from local building supply stores for your chosen Hardie board type, color, and any necessary accessories. Remember to add a 10-15% buffer for waste and unexpected needs.
Labor Costs
Labor costs are a substantial portion of the overall project expense. The cost per square foot for labor can vary significantly depending on your location, the complexity of the job (e.g., removal of existing siding, underlying repairs), and the contractor’s experience. Get at least three quotes from reputable contractors to compare pricing and ensure you’re getting a fair price. Factor in the time required for demolition, installation, and cleanup. A simple project might cost $3-$5 per square foot for labor, while more complex projects could cost significantly more.
Permit Costs
Depending on your local regulations, you may need to obtain permits for the Hardie board replacement. Permit costs vary by location and the scope of the project. Contact your local building department to inquire about permit requirements and associated fees. These costs are often a small percentage of the total project cost but are important to account for.
Sample Budget Template
| Item | Estimated Cost |
|---|---|
| Material Costs (Hardie Board, Fasteners, Primer, Paint) | $[Estimate based on square footage and material choices] |
| Labor Costs (Demolition, Installation, Cleanup) | $[Estimate based on contractor quotes] |
| Permit Costs | $[Estimate based on local regulations] |
| Contingency (10-15% of total cost) | $[10-15% of the sum of the above costs] |
| Total Estimated Cost | $[Sum of all costs] |
For example, a 1000 square foot project with mid-range Hardie board, labor at $4/sq ft, and $200 in permit fees could cost approximately $6200 (materials estimated at $2000) plus contingency.
Maintenance and Prevention
Proper maintenance is key to extending the lifespan of your Hardie board siding. Neglecting regular upkeep can lead to premature deterioration and costly repairs down the line. By following a simple maintenance plan, you can protect your investment and ensure your home’s exterior remains attractive and weather-resistant for years to come.
Preventing future Hardie board damage involves a proactive approach encompassing regular cleaning, prompt repair of minor damage, and protection from the elements. This section details practical strategies for maintaining your Hardie board and preventing common issues.
Regular Cleaning and Inspection
Regular cleaning removes dirt, grime, and mildew buildup, preventing these substances from damaging the surface of the Hardie board. A simple solution of water and mild detergent applied with a soft brush or pressure washer (using a low-pressure setting) is generally sufficient. Inspect the siding after cleaning, paying close attention to seams, joints, and areas prone to moisture accumulation. Look for cracks, chips, or signs of water damage. Addressing minor issues promptly prevents them from escalating into larger, more expensive problems. For example, a small crack left untreated can allow moisture to penetrate, leading to rot and weakening of the board. Annual inspections are recommended, with more frequent checks in harsh climates.
Protecting Hardie Board from Harsh Weather Conditions
Hardie board is designed to withstand harsh weather, but prolonged exposure to extreme conditions can still cause damage. In areas with heavy snowfall, ensure proper drainage to prevent water from accumulating against the siding. Regularly clean gutters and downspouts to avoid water overflow. In regions with intense sun exposure, consider using a high-quality exterior paint designed for Hardie board to protect against UV degradation. This paint acts as a barrier, preventing fading and cracking. For coastal areas, the salt spray can be particularly damaging. Regular rinsing with fresh water can help remove salt deposits that can corrode the surface.
Proper Sealing and Caulking
Proper sealing and caulking around windows, doors, and other penetrations in the Hardie board is crucial for preventing water intrusion. Caulk acts as a barrier, preventing moisture from seeping behind the siding and causing damage. Regularly inspect caulking for cracks or gaps and reapply as needed. Use a high-quality, exterior-grade caulk specifically designed for use with fiber cement siding. For example, a silicone-based caulk offers excellent durability and weather resistance. Pay particular attention to areas where the siding meets other building materials, such as trim or flashing. These are common points of water entry.
Visual Guide to Hardie Board Replacement
Source: theduvallhomestead.com
This section provides a visual walkthrough of a properly completed Hardie board installation, highlighting key aspects for a successful and long-lasting result. Understanding these visual cues will help you assess the quality of your installation or the work of a contractor.
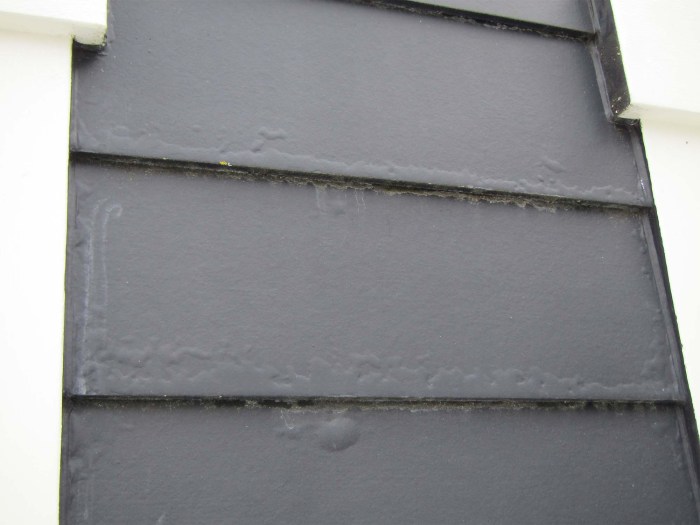
Properly installed Hardie board siding presents a clean, uniform appearance. The panels should be neatly aligned, with consistent spacing between them and minimal gaps. Fasteners, seams, and caulking play crucial roles in achieving this.
Hardie Board Appearance: Fasteners, Seams, and Caulking
Properly installed Hardie board siding features fasteners that are countersunk and completely hidden beneath the surface of the board. These fasteners typically galvanized nails or screws, are spaced according to manufacturer recommendations to prevent warping and allow for expansion and contraction. Seams between panels should be straight, tight, and butted together, not overlapping. Caulking, typically paintable acrylic latex caulk, fills any gaps between the panels and around windows and doors, creating a watertight seal. This caulking should be smooth and neatly applied, not overly thick or messy. A high-quality finish minimizes the visibility of seams, creating a professional look.
Cutting and Fitting Hardie Board Around Windows and Doors
Cutting Hardie board requires a circular saw with a carbide-tipped blade designed for cutting fiber cement. Precise measurements are crucial. For windows and doors, measure carefully, allowing for the thickness of the trim and any expansion gaps. The board should be cut slightly oversized, allowing for adjustments during fitting. Once cut, the panel is carefully positioned around the window or door frame, ensuring a snug fit. Any gaps are filled with caulk before painting or staining. The cuts should be clean and straight, avoiding any splintering or ragged edges. A sharp blade and a steady hand are essential for achieving this. Consider using a scoring tool for cleaner cuts on smaller sections.
Surface Preparation for Painting or Staining
Before painting or staining, the Hardie board surface needs thorough preparation. This involves cleaning the surface to remove any dirt, dust, or debris. A stiff brush and a mild detergent solution are effective. Allow the surface to dry completely. Next, prime the Hardie board with a high-quality primer specifically formulated for fiber cement. This primer improves paint adhesion and provides a uniform base for the final coat. Allow the primer to dry completely before applying paint or stain. The final paint or stain should be applied evenly, following the manufacturer’s instructions. Multiple thin coats are generally preferred to one thick coat. Once the paint or stain is dry, the surface should be smooth and even, exhibiting a professional, finished look. Any minor imperfections can be addressed with light sanding before the final coat.
Conclusive Thoughts
Replacing the ardie board can seem complex, but by following this guide, you’ll be equipped to tackle the project efficiently and effectively. Remember, proper assessment, material selection, and installation techniques are key to a successful and long-lasting outcome. With a little planning and attention to detail, you can enjoy the beauty and durability of your renewed siding for years to come. So, grab your tools, and let’s get that Hardie board looking its best!
Q&A
Can I replace the Hardie board myself, or do I need a professional?
While DIY is possible for smaller projects, larger or complex replacements often benefit from professional expertise. Assess your skill level honestly.
How long does Hardie board replacement typically take?
The time required varies greatly depending on the size of the area, the complexity of the job, and your experience. Expect a range from a few days to several weeks.
What’s the warranty on the Hardie board?
Warranty specifics depend on the product and manufacturer. Check the manufacturer’s website or documentation for details.
Can I paint the Hardie board immediately after installation?
Allow sufficient drying time before painting. Consult the manufacturer’s instructions for specific recommendations.
What’s the best way to clean Hardie’s board?
Generally, a gentle wash with soap and water is sufficient. Avoid harsh chemicals or abrasive cleaners.