Hardie Board Siding Replacement A Complete Guide
Hardie board siding replacement is a significant home improvement project, offering a blend of durability and aesthetic appeal. This guide walks you through every step, from recognizing the need for replacement to selecting a qualified contractor and maintaining your new siding. We’ll cover material properties, installation techniques, cost considerations, and everything in between, empowering you to make informed decisions throughout the process.
Understanding the lifespan and potential issues of Hardie board siding is crucial. We’ll explore the signs that indicate it’s time for replacement, compare repair costs to full replacement, and delve into the preparation and planning necessary for a successful project. We’ll also provide a detailed breakdown of the removal and installation process, emphasizing safety and best practices.
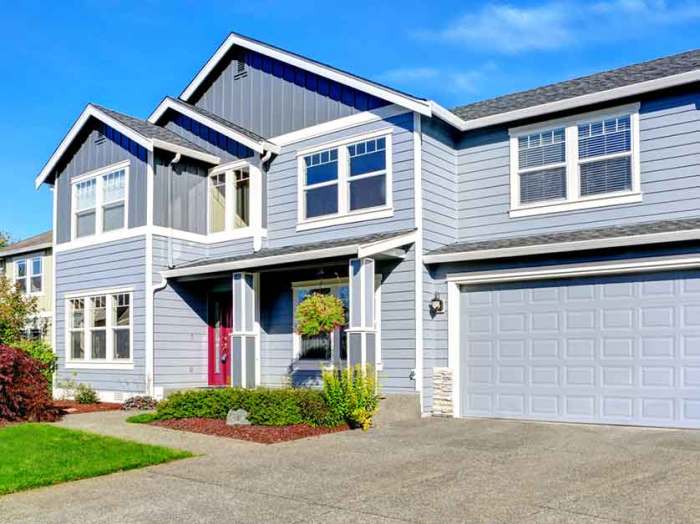
Hardie Board Siding
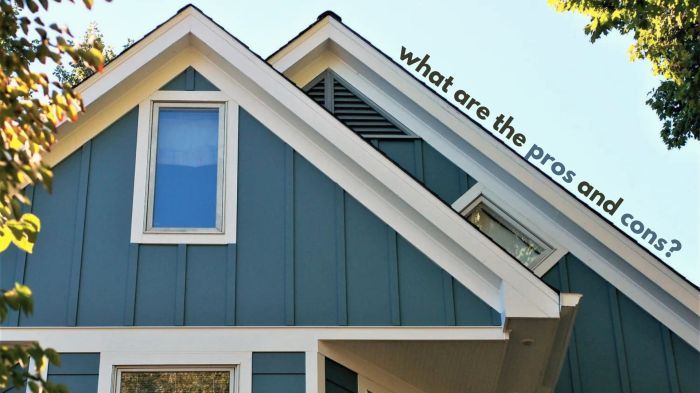
Hardie board siding, a popular choice for homeowners, offers a durable and attractive alternative to traditional wood siding. Its composition and manufacturing process contributes to its longevity and resistance to various weather conditions. Understanding these aspects is crucial for making informed decisions about home exterior maintenance and upgrades.
Hardie Board Siding Composition and Manufacturing
Hardie board siding is primarily composed of cement, cellulose fibers, and other additives. The manufacturing process involves mixing these ingredients into a slurry, which is then formed into panels under high pressure. These panels are then cured, often in a kiln, to achieve the desired strength and durability. The final product is a fiber cement composite that’s remarkably resistant to damage from impact, moisture, and insects. Different finishes, such as paint or stain, are applied during or after the manufacturing process to enhance aesthetics and protection.
Hardie Board Siding Lifespan and Climatic Conditions
The lifespan of Hardie board siding is significantly influenced by climate. In mild climates with moderate rainfall and temperature fluctuations, Hardie board siding can last for 50 years or more with proper maintenance. However, in harsh climates with extreme temperature swings, heavy rainfall, or prolonged exposure to direct sunlight, the lifespan might be somewhat shorter, potentially ranging from 30 to 40 years. Regular maintenance, including repainting or restaining as needed, is key to extending its lifespan regardless of the climate. For example, coastal areas with high salinity can accelerate the degradation of the siding’s finish if not properly protected.
Hardie Board Siding Durability Compared to Other Siding Materials
Compared to vinyl siding, Hardie board offers superior durability and resistance to damage. Vinyl siding can easily dent or crack, while Hardie board can withstand impacts better. Wood siding, while aesthetically pleasing, is susceptible to rot, and and insect infestation, and requires more frequent maintenance. Hardie board provides a good balance between the aesthetic appeal of wood and the low-maintenance characteristics of vinyl, offering a longer lifespan than both.
Factors Contributing to Premature Degradation of Hardie Board Siding
Several factors can contribute to the premature degradation of Hardie board siding. Neglecting regular cleaning and maintenance, such as allowing dirt and grime to accumulate, can lead to faster deterioration. Exposure to extreme weather conditions, especially prolonged periods of intense sunlight or freezing temperatures, can also impact its lifespan. Improper installation, such as inadequate sealing or fastening, can allow moisture to penetrate the siding, causing damage. Finally, using inappropriate cleaning products or methods can also damage the finish and shorten the lifespan of the siding. For instance, using abrasive cleaners can scratch the surface, making it more susceptible to moisture damage.
Identifying the Need for Hardie Board Siding Replacement

Source: storables.com
Knowing when to replace your Hardie board siding is crucial for maintaining your home’s curb appeal and protecting its structural integrity. Ignoring signs of damage can lead to more extensive (and expensive) repairs down the line. This section will help you identify when it’s time to consider a full replacement.
Several factors indicate the need for Hardie board siding replacement. These range from easily visible signs of damage to more subtle performance issues that may hint at underlying problems. Regular inspection is key to catching problems early.
Signs Indicating the Need for Hardie Board Siding Replacement
A thorough inspection of your Hardie board siding should be conducted annually, or more frequently in harsh weather conditions. Look for these visual cues and performance issues:
- Significant cracking or splitting: Large cracks or splits in the siding panels, especially those running along the length of the board, indicate structural weakness and potential water damage. These cracks often appear as thin lines that gradually widen over time.
- Extensive water damage: Swelling, discoloration (often dark staining), or soft spots in the siding panels are clear signs of water intrusion. This can lead to rot and mold growth, compromising the siding’s integrity and potentially affecting the underlying structure of your home.
- Loose or missing siding: Panels that are loose, rattling in the wind, or completely missing indicate fastener failure or damage to the underlying sheathing. This compromises the weather-resistant barrier of your siding.
- Severe discoloration or fading: While some fading is normal over time, extreme discoloration or uneven fading may indicate sun damage or a failing paint job. This can lead to further deterioration of the siding material itself.
- Pest infestation: Evidence of insect or rodent damage, such as holes or tunnels in the siding, necessitates immediate attention. Pests can weaken the structural integrity of the siding and potentially damage the home’s insulation.
Implications of Delaying Hardie Board Siding Replacement
Delaying necessary Hardie board siding replacement can have significant consequences. Ignoring even minor damage can lead to a cascade of problems, resulting in far greater expense and inconvenience than addressing the issue promptly.
- Increased water damage: Small cracks and gaps can allow water to penetrate, leading to rot, mold growth, and damage to the underlying structure of your home. This can necessitate extensive repairs, including replacing sheathing and insulation.
- Higher repair costs: The longer you wait, the more extensive the damage will become, increasing the overall cost of repair. A small repair could become a major renovation.
- Reduced home value: Visible damage to your siding significantly impacts your home’s curb appeal and market value. Potential buyers will likely factor in the cost of repairs, reducing your asking price.
- Structural instability: Severe damage to the siding can compromise the structural integrity of your home, potentially leading to more significant and costly repairs in the future.
Repair Versus Replacement Costs
The decision between repairing and replacing your Hardie board siding depends on the extent of the damage. A small area of damage may be repairable, while widespread damage necessitates a full replacement. The following table illustrates a general comparison of costs, but actual figures can vary based on location, labor rates, and the extent of the work.
| Type of Work | Cost Range (USD) | Considerations | Typical Scenario |
|---|---|---|---|
| Repair (small area) | $200 – $1,000 | Suitable for minor damage, like a few cracked panels. | Replacing a few damaged panels around a window. |
| Repair (moderate area) | $1,000 – $5,000 | Addresses more extensive damage but is still localized. | Repairing damage from a small storm affecting a section of the house. |
| Full Replacement | $5,000 – $20,000+ | Necessary for widespread damage or aged siding. | Replacing all siding due to age, significant storm damage, or consistent water issues. |
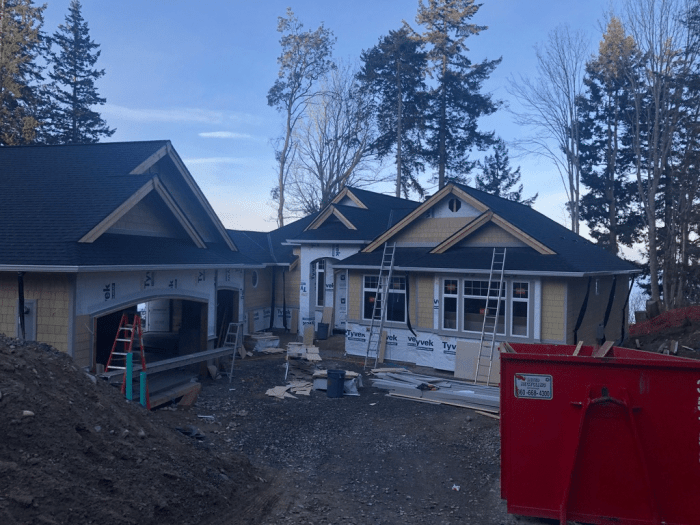
Preparation and Planning for Replacement

Source: storables.com
Replacing your home’s siding is a significant undertaking, requiring careful preparation and planning to ensure a smooth and efficient process. Proper planning minimizes disruptions, reduces potential problems, and ultimately saves you time and money. This section illustrates the key steps involved in preparing your home for Hardie board siding replacement.
Preparing the Home for Siding Replacement
Before any siding is removed or installed, several preparatory steps are crucial. This includes protecting landscaping, securing utilities, and ensuring safe working conditions. Failing to take these steps can lead to damage and delays.
- Landscaping Protection: Cover shrubs, flowerbeds, and other landscaping features with heavy-duty tarps or plastic sheeting to prevent damage from falling debris. Secure the coverings with weights or stakes.
- Utility Disconnections: Locate and disconnect any exterior electrical outlets, cable lines, or water spigots near the work area. This prevents accidental damage or electrical hazards during the removal and installation process. Consider temporary power solutions if necessary.
- Scaffolding and Access: If your home is two stories or taller, secure and properly erect scaffolding to provide safe and easy access to all areas needing work. Ensure the scaffolding meets all safety regulations and is properly anchored.
- Surface Preparation: Remove any loose or damaged siding, trim, or flashing around windows and doors. Clean the underlying sheathing thoroughly to ensure a good bond for the new siding. Repair any rotted or damaged wood before installation.
- Permits and Inspections: Check with your local building department to determine if permits are required for the siding replacement. Schedule necessary inspections throughout the project to ensure compliance with building codes.
Necessary Tools and Equipment
Having the right tools on hand is essential for a successful Hardie board siding replacement. The list below Artikels the essential equipment, ranging from basic hand tools to specialized power tools. Renting specialized equipment can be cost-effective if you don’t plan to use them frequently.
- Measuring and Marking Tools: Measuring tape, chalk line, level, pencil.
- Cutting Tools: Circular saw (with fine-tooth blade for Hardie board), hand saw, utility knife.
- Fastening Tools: Nail gun (capable of driving galvanized nails into Hardie board), hammer, drill.
- Safety Equipment: Safety glasses, work gloves, dust mask, hearing protection, scaffolding (if necessary), and fall protection (if working at heights).
- Other Essential Tools: Pry bar, putty knife, caulk gun, ladder (if necessary), and trash cans for debris removal.
Sample Project Timeline
The duration of a Hardie board siding replacement project varies significantly depending on the size of the house, the complexity of the design, and the experience of the workers. This example assumes a moderately sized single-family home with a standard siding configuration and a two-person crew.
| Phase | Duration | Key Milestones |
|---|---|---|
| Preparation & Planning | 1-2 days | Secure permits, order materials, protect landscaping |
| Siding Removal | 2-3 days | Complete removal of old siding, inspect the sheathing |
| Sheathing Repair (if needed) | 1-2 days | Repair or replace damaged sheathing |
| Siding Installation | 5-7 days | Install new Hardie board siding, trim, and flashing |
| Cleanup & Final Inspection | 1 day | Remove debris, conduct a final inspection |
Note: This is a sample timeline, and actual durations may vary.
Workflow Diagram for Siding Removal and Installation
The following describes a visual representation of the workflow. Imagine a flowchart with boxes representing each stage.
Stage 1: Preparation – This includes protecting the landscaping, disconnecting utilities, and setting up scaffolding (if needed).
Stage 2: Siding Removal – Carefully remove the existing siding, starting from the top and working down. Take note of the installation pattern for easier re-installation.
Stage 3: Sheathing Inspection & Repair – Thoroughly inspect the underlying sheathing for damage. Repair or replace any rotted or damaged sections.
Stage 4: Siding Installation – Begin installing the new Hardie board siding, following the manufacturer’s instructions. Ensure proper overlapping and fastening.
Stage 5: Trim and Flashing Installation – Install trim around windows, doors, and other features. Install flashing to prevent water penetration.
Stage 6: Final Cleanup and Inspection – Remove all debris and conduct a final inspection to ensure proper installation and adherence to building codes.
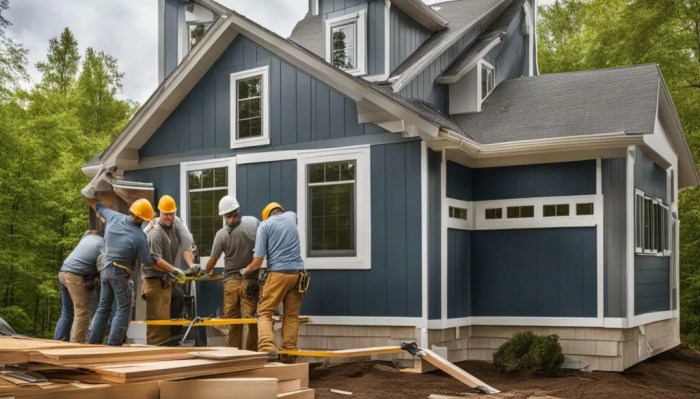
Hardie Board Siding Removal and Installation Techniques
Replacing Hardie board siding is a significant undertaking, but with careful planning and execution, you can achieve a beautiful and durable exterior. This section details the safe and effective removal of existing siding and the proper installation of the new Hardie board, emphasizing techniques for a long-lasting, watertight finish.
Safe Hardie Board Siding Removal
Removing existing Hardie board siding requires caution to prevent injury and damage. Always wear appropriate safety gear, including safety glasses, gloves, and a dust mask. Begin by carefully removing any trim or accessories attached to the siding. Use a pry bar to gently loosen the bottom edge of each panel, working your way up. Avoid excessive force, which could damage the underlying sheathing or cause the panel to shatter. Dispose of the old siding responsibly, according to local regulations. For larger projects, consider renting a demolition hammer to speed up the process, but always prioritize safety.
Hardie Board Siding Installation Steps
Installing new Hardie board siding involves several key steps to ensure a proper fit and long-lasting performance. First, inspect the underlying sheathing for damage and repair any issues before installing the new siding. Begin installation at the bottom of the wall, ensuring the first course is level and plumb. Each subsequent course should overlap the previous one by a specified amount (typically 1/2 inch to 1 inch), creating a water-resistant barrier. Use galvanized nails or screws, spaced according to the manufacturer’s instructions, ensuring proper penetration into the sheathing. For larger panels, consider using a nail gun to increase efficiency and consistency. Remember to always pre-drill holes for screws to avoid splitting the Hardie board.
Comparing Hardie Board Siding Installation Methods, Hardie board siding replacement
While the basic principles remain the same, there are variations in Hardie board siding installation. The most common method involves using horizontal lap siding, where panels are installed horizontally, overlapping each other. This method is relatively straightforward and widely used. Vertical installation is also possible, offering a different aesthetic appeal, but it may require more attention to detail in ensuring proper water management. Regardless of the chosen method, adhering to the manufacturer’s instructions and using appropriate fasteners is crucial for a successful installation.
The Importance of Flashing and Sealing
Proper flashing and sealing are critical for preventing water damage and ensuring the longevity of your Hardie board siding. Flashing, typically made of metal or rubber, should be installed at all vulnerable points, such as window and door openings, corners, and around any penetrations. This creates a barrier to prevent water from entering the wall system. All joints and seams between the siding panels should be sealed with a high-quality, paintable caulk, ensuring a watertight seal. This prevents water from seeping behind the siding and causing rot or mold. Regular inspection and maintenance of the flashing and sealant are essential to maintain the integrity of the siding system over time. Neglecting this aspect can lead to costly repairs down the line. A properly installed flashing system, combined with thorough sealing, will protect your investment and maintain the aesthetic appeal of your home for years to come. For example, a poorly sealed window flashing can lead to water damage within the wall cavity, resulting in mold growth and structural issues. Similarly, inadequate caulking around siding joints can allow water penetration, leading to rot and the need for extensive repairs.
Maintenance and Care of New Hardie Board Siding
Proper maintenance is key to preserving the beauty and longevity of your new Hardie board siding. Regular cleaning and occasional inspections will help prevent problems and ensure your investment remains protected for years to come. This section details a simple maintenance schedule and Artikel solutions for common issues.
Hardie Board Siding Maintenance Schedule
A regular maintenance schedule helps prevent minor problems from becoming major headaches. This schedule balances thoroughness with practicality, ensuring your siding stays in top condition without requiring excessive effort.
- Annual Inspection: Perform a visual inspection of your entire siding area, checking for loose or damaged boards, signs of insect infestation, or any other abnormalities. Pay close attention to areas prone to moisture buildup, such as around windows and doors.
- Spring Cleaning: Wash your siding with a gentle solution of water and mild detergent using a soft-bristled brush or a pressure washer (using a low-pressure setting). Rinse thoroughly to remove all soap residue.
- Fall Cleaning (Optional): A second cleaning in the fall can remove accumulated debris and prepare your siding for winter. This is especially beneficial in areas with heavy tree cover.
Cleaning Methods for Hardie Board Siding
Cleaning your Hardie board siding is straightforward, but using the correct methods prevents damage. Avoid harsh chemicals and abrasive cleaners.
For routine cleaning, a mixture of water and mild dish soap is usually sufficient. Apply the solution using a soft-bristled brush or sponge, scrubbing gently to remove dirt and grime. For more stubborn stains, you can use a pressure washer, but always maintain a safe distance and use a low-pressure setting to avoid damaging the siding. Never use a wire brush or other abrasive tools, as these can scratch the surface.
For mildew or mold, a solution of bleach and water (one part bleach to three parts water) can be effective. Apply this solution sparingly, allowing it to sit for a few minutes before rinsing thoroughly. Always wear protective gloves and eyewear when using bleach.
Common Issues and Solutions for Hardie Board Siding
While Hardie board siding is durable, some problems can occur. Knowing how to address these issues promptly can prevent further damage.
- Cracks or Chips: Small cracks or chips can often be repaired with a suitable caulk or patching compound designed for fiber cement. For larger damage, replacement of the affected board may be necessary.
- Mildew or Mold: Regular cleaning helps prevent mildew and mold growth. For existing growth, a bleach solution (as described above) can be effective. Persistent or extensive growth may require professional cleaning.
- Water Damage: Proper caulking around windows, doors, and other penetrations is crucial to prevent water damage. Addressing leaks promptly is vital to prevent further deterioration of the siding and underlying structure.
- Insect Infestation: Inspect your siding regularly for signs of insect activity, such as holes or frass (insect droppings). If infestation is detected, contact a pest control professional for treatment.
Tips for Extending the Lifespan of Hardie Board Siding
Taking proactive steps will significantly extend the life of your Hardie board siding. These simple tips can make a big difference.
- Regularly inspect your siding for any damage or signs of wear.
- Clean your siding at least once a year to remove dirt, debris, and mildew.
- Promptly repair any cracks, chips, or other damage to prevent further deterioration.
- Ensure proper caulking around windows, doors, and other penetrations to prevent water intrusion.
- Address any pest infestations promptly to prevent significant damage.
- Avoid using harsh chemicals or abrasive cleaners that could damage the siding’s finish.
Cost Considerations and Budgeting for Replacement

Source: advanceroofingllc.com
Replacing your home’s siding with Hardie board is a significant investment, but understanding the cost breakdown can help you plan effectively. Several factors influence the overall expense, and careful budgeting is crucial for a smooth project. This section will break down the costs and explore financing options.
Cost Components of Hardie Board Siding Replacement
The total cost of Hardie board siding replacement is comprised of several key elements. These include the cost of materials, labor, permits, and any unforeseen expenses. Accurate estimation requires a detailed assessment of your home’s size and condition, as well as the complexity of the project.
- Materials: The cost of Hardie board siding itself varies based on the type, color, and texture chosen. Additional materials like flashing, trim, fasteners, and underlayment also contribute to the overall material cost. Expect to pay anywhere from $1 to $5 per square foot for the siding itself, depending on these factors.
- Labor: Labor costs represent a significant portion of the total project expense. The amount will depend on the size of your home, the complexity of the job (e.g., removing existing siding, extensive repairs), and the contractor’s hourly rate or project fee. Labor costs can range from $2 to $8 per square foot, or even more for intricate projects.
- Permits: Building permits are usually required for exterior renovations of this scale. The cost varies depending on your location and the scope of the project. It’s crucial to factor this into your budget early in the planning stages, as delays can occur if permits aren’t secured beforehand.
- Contingency: Always include a contingency fund (typically 10-20% of the total estimated cost) to cover unexpected expenses, such as discovering hidden damage during the removal of old siding, or material price increases.
Cost Breakdowns for DDifferent-SizedHomes
To illustrate, let’s consider hypothetical examples for different-sized homes:
| Home Size (sq ft) | Material Cost (Estimate) | Labor Cost (Estimate) | Permit Cost (Estimate) | Total Estimated Cost (Estimate) |
|---|---|---|---|---|
| 1500 sq ft | $2250 – $7500 | $3000 – $12000 | $300 – $1000 | $5550 – $20500 |
| 2500 sq ft | $3750 – $12500 | $5000 – $20000 | $500 – $1500 | $9250 – $34000 |
| 3500 sq ft | $5250 – $17500 | $7000 – $28000 | $700 – $2000 | $13000 – $47500 |
*Note: These are rough estimates. Actual costs can vary significantly depending on location, materials selected, and labor rates.*
Comparing Pricing from Different Contractors
Obtaining multiple quotes from different contractors is essential. This allows for comparison of pricing, services offered, and overall value. When comparing quotes, ensure that you are comparing apples to apples; make sure each quote includes the same scope of work, materials, and guarantees.
Financing Options for Home Improvement Projects
Several financing options exist for home improvement projects like siding replacement. These include:
- Home Equity Loans: These loans use your home’s equity as collateral. Interest rates are typically lower than other unsecured loans.
- Home Equity Lines of Credit (HELOCs): These offer a revolving credit line, allowing you to borrow and repay as needed.
- Personal Loans: These are unsecured loans, meaning they don’t require collateral. Interest rates are usually higher than home equity loans.
- Contractor Financing: Some contractors offer financing options directly to customers, simplifying the process.
Finding and Selecting Qualified Contractors
Choosing the right contractor is crucial for a successful Hardie board siding replacement. A poorly chosen contractor can lead to shoddy workmanship, cost overruns, and significant headaches. Taking the time to thoroughly vet potential contractors will save you time, money, and stress in the long run.
Finding a reliable and skilled contractor involves several key steps, from asking the right questions to carefully evaluating their credentials and past performance. This process ensures you’re making an informed decision that protects your investment and results in a beautiful, long-lasting exterior for your home.
Contractor Qualification Questions
Before inviting any contractor to bid on your project, it’s essential to have a list of questions ready. These questions will help you assess their experience, expertise, and suitability for your project. Thorough questioning helps you avoid potential problems down the line.
- Years of experience specializing in Hardie board siding installation and replacement.
- Several similar projects were completed in the past year, including examples of completed projects and client references.
- Detailed explanation of their process, from initial consultation to final cleanup.
- Information on their warranty and guarantee policies for materials and labor.
- List of subcontractors they regularly use and their qualifications.
- Specific questions regarding your project, such as their approach to handling difficult areas or potential challenges.
Verification of Contractor Licenses and Insurance
Verifying a contractor’s licensing and insurance is non-negotiable. This protects you from potential legal and financial liabilities. Unlicensed or uninsured contractors pose significant risks.
- Confirm that the contractor holds a valid, up-to-date license for your state or region. Contact your state’s licensing board to verify.
- Request proof of general liability insurance and workers’ compensation insurance. This protects you from liability if someone is injured on your property during the project.
- Check the insurance policy’s coverage limits to ensure they are adequate for the scope of your project.
Comparing Contractor Bids
Once you’ve narrowed down your choices, comparing bids becomes critical. Don’t just focus on the lowest price; consider the overall value proposition. Hidden costs and poor workmanship can ultimately be far more expensive than a slightly higher upfront cost.
- Ensure all bids include detailed itemized lists of materials and labor costs.
- Compare the proposed timelines for project completion.
- Analyze the proposed payment schedules and payment terms.
- Scrutinize the warranty and guarantee provisions included in each bid.
Evaluating Contractor Reviews and Testimonials
Online reviews and testimonials provide valuable insights into a contractor’s reputation and past performance. However, be aware that reviews can be manipulated, so consider the overall pattern and look for consistent themes.
- Check multiple review platforms, such as Google My Business, Yelp, Angie’s List, and HomeAdvisor.
- Look for patterns in positive and negative reviews. A few negative reviews are normal, but a high volume of negative feedback should raise red flags.
- Consider the age and detail of the reviews. Recent reviews are more relevant than older ones.
- Contact previous clients directly to discuss their experiences, if possible.
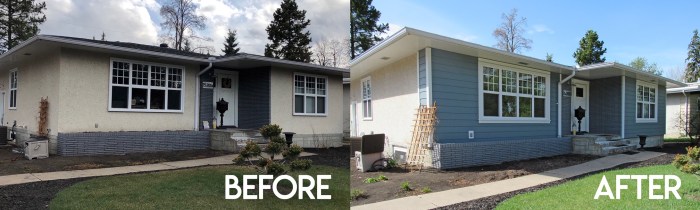
Illustrative Examples of Hardie Board Siding Replacement Projects
This section details three distinct Hardie board siding replacement projects, showcasing the range of complexity and considerations involved in such undertakings. Each example highlights material choices, labor requirements, and the final aesthetic result. Remember that these are examples, and your specific project will have unique requirements.
Small Repair Project: Damaged Corner Section
This project involved replacing a small section of Hardie board siding damaged by a fallen tree branch on a single-story ranch house. The damaged area encompassed approximately 4 square feet on a corner. The existing siding was a light gray. Materials used included a single 12″ x 8′ Hardie Plank in the original light gray, matching caulk, and exterior-grade nails. The labor involved removing the damaged section, cutting and fitting the replacement piece, caulking the seams, and painting the new section to match the existing siding. The repair blended seamlessly with the existing siding, effectively restoring the original appearance. The total time spent on the project was approximately half a day for a skilled DIYer.
Full House Replacement Project: Victorian-Style Home
This project involved a complete replacement of the Hardie board siding on a two-story Victorian-style home. The original siding was showing significant age and deterioration. The homeowner chose a deep, rich brown Hardie Plank siding to complement the home’s architectural details. Complex trim work, including intricate corner boards and decorative moldings, required careful measurement and precision cutting. The project involved significant labor, requiring the removal of all existing siding, installation of new sheathing where necessary, and installation of the new Hardie Plank siding, including all trim pieces. The final result dramatically enhanced the home’s curb appeal, showcasing the intricate details of the Victorian design. This project took a team of experienced professionals approximately three weeks to complete.
Complex Architectural Details Project: Modern Farmhouse with Metal Accents
This project featured a modern farmhouse with a combination of Hardie board siding and metal accents. The existing siding, a combination of light gray and white, was outdated. The homeowners opted for a contemporary look using a combination of dark gray Hardie panel siding and black metal accents. This required careful planning and execution to ensure a cohesive aesthetic. The intricate design included multiple siding transitions, requiring custom cutting and precise installation. The project included removing the existing siding, installing a new vapor barrier, installing the dark gray Hardie panel siding, and installing the black metal accents around windows and doors. The final product successfully blended the modern farmhouse aesthetic with the durability of Hardie board siding, creating a striking and sophisticated look. This project required the expertise of a specialized contractor and took approximately four weeks to complete.
Last Recap: Hardie Board Siding Replacement
Source: kvconstruction.net
Replacing your Hardie board siding is a worthwhile investment that enhances your home’s curb appeal and protects it from the elements. By following the steps Artikel in this guide, from careful planning and contractor selection to proper installation and maintenance, you can ensure a long-lasting and beautiful result. Remember, a well-maintained Hardie board siding system can significantly extend the life of your home’s exterior. So, take your time, do your research, and enjoy the transformation!
FAQ
Can I replace HHardie’s board siding myself?
While possible for smaller projects, full-house replacements often require professional expertise due to the complexity and safety considerations involved. Smaller repairs are more feasible for DIYers with experience.
How long does Hardie board siding replacement typically take?
The timeframe varies greatly depending on the size of the house, the complexity of the design, and weather conditions. Expect several days to several weeks for a full replacement.
What are the warranty options for Hardie board siding?
James Hardie, the manufacturer, offers warranties on their products. Check with your contractor and supplier for specifics, as warranty details can vary.
What color options are available for Hardie board siding?
A wide range of colors is available, from classic neutrals to vibrant shades. Check the James Hardie color palette for options and consider your home’s style and surroundings.
How often should I clean my Hardie board siding?
Regular cleaning, ideally once or twice a year, using a mild detergent and water, will help maintain its appearance and extend its lifespan.