Replace Hardie Board Siding A Homeowners Guide
Replace Hardie Board Siding: Thinking about upgrading your home’s exterior? Hardie board siding, while durable, eventually needs replacing. This guide walks you through the entire process, from understanding why replacement is necessary to choosing the right material and finding a reliable contractor. We’ll cover costs, and maintenance, and even show you some stunning before-and-after examples to inspire your project.
We’ll delve into the reasons why you might need to replace your Hardie board siding, exploring common issues and comparing its lifespan to other popular siding options. You’ll learn how to assess the situation, determine whether repair or full replacement is best, and discover the various materials available, weighing their pros and cons to make an informed decision. We’ll also provide a detailed cost breakdown, tips for finding a trustworthy contractor, and essential maintenance advice to protect your investment for years to come.
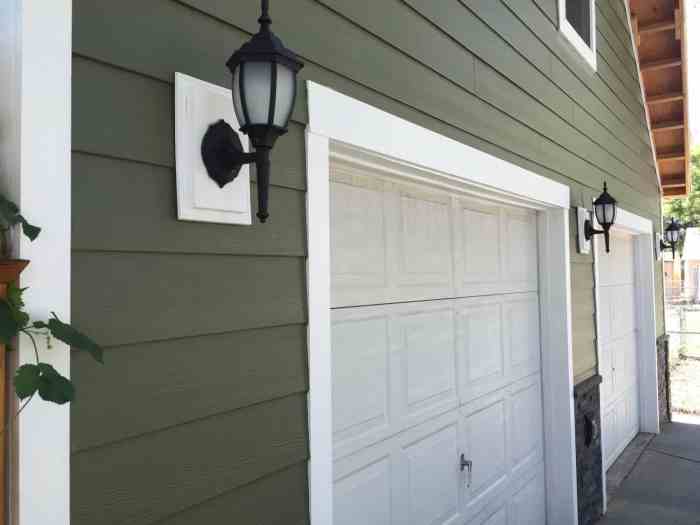
Why Replace Hardie Board Siding?
Source: sawshub.com
Hardie board siding, while durable, isn’t indestructible. Over time, even this high-quality material can succumb to the elements and require replacement rather than simple repairs. Understanding the reasons for replacement and the signs that signal it’s time for a new siding system can save you money and headaches in the long run.
Common Reasons for Hardie Board Siding Replacement and Signs of Deterioration
Reasons for Replacement
Several factors contribute to the decision to replace Hardie’s board siding. These range from cosmetic issues to structural concerns, indicating the need for a more extensive solution than simple patching. Ignoring these signs can lead to more significant and costly problems down the line. For instance, extensive damage from a severe storm might necessitate a complete replacement, whereas minor damage from weathering might only require localized repairs.
Signs Indicating Replacement is Necessary
Severe damage, such as extensive cracking, warping, or water damage that penetrates the sheathing, clearly indicates a need for replacement. Also, if significant portions of the siding are damaged beyond repair, replacing the entire system is often more cost-effective than piecemeal repairs. Consider replacement if you notice widespread discoloration or fading that cannot be addressed with cleaning, or if the siding is showing signs of significant deterioration due to prolonged exposure to harsh weather conditions like extreme sun, rain, or freeze-thaw cycles. Furthermore, pest infestations that compromise the structural integrity of the siding require full replacement.
Replacement Versus Repair Scenarios
Determining whether to repair or replace Hardie board siding often depends on the extent and nature of the damage. Minor dents, scratches, or small areas of discoloration can usually be repaired with paint or patching compounds. However, significant damage such as large cracks, water damage affecting the underlying structure, or extensive pest infestation usually requires complete replacement. For example, a single cracked board can often be replaced, but if multiple boards are damaged nearby, it’s often more efficient and aesthetically pleasing to replace a larger section or even the entire wall.
Lifespan Comparison
Hardie board siding boasts a longer lifespan than many other siding materials. While it can last 30-50 years or even longer with proper maintenance, its lifespan is still finite and can be significantly reduced by neglect or severe weather events. In comparison, vinyl siding typically lasts 20-30 years, while wood siding requires more frequent maintenance and may only last 15-25 years, depending on the wood type and climate. The longevity of aluminum siding is comparable to vinyl, but it can be more prone to dents and scratches. Therefore, while the Hardie board offers a significant advantage in terms of longevity, it’s still essential to monitor its condition and address issues promptly to maximize its lifespan.
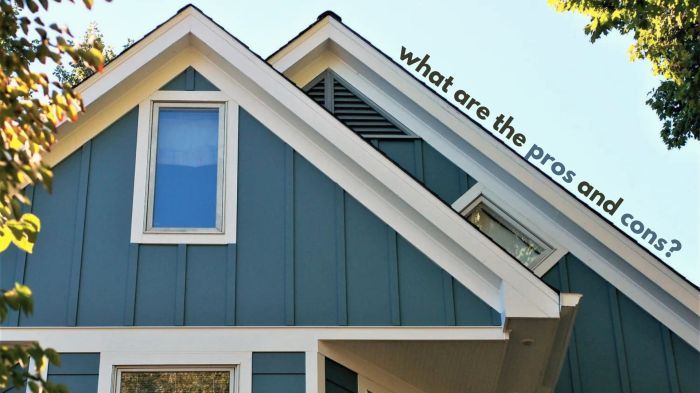
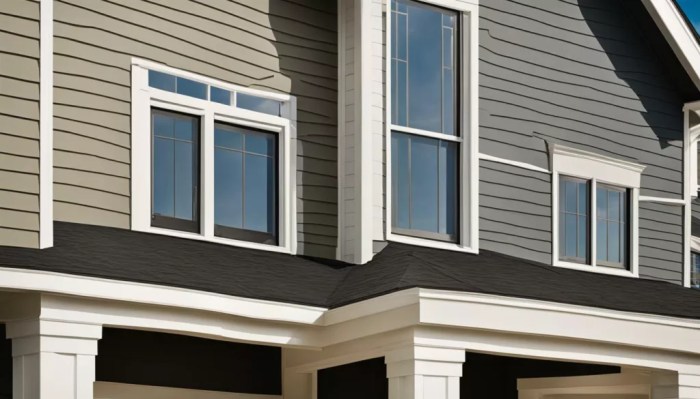
Alternative Siding Materials
Source: myengineeringsupport.com
Choosing the right siding replacement for your home is a big decision, impacting both aesthetics and long-term costs. While Hardie board is a popular option, several alternatives exist, each with its own set of advantages and disadvantages. Let’s explore some of the most common choices and help you weigh your options.
Comparison of Siding Materials
This table compares Hardie board (fiber cement) with vinyl, wood, and metal siding across key factors. Remember that actual costs and lifespans can vary depending on factors like material quality, installation, and climate.
| Material | Cost (Relative) | Lifespan (Years) | Maintenance |
|---|---|---|---|
| Hardie Board (Fiber Cement) | Medium-High | 30-50+ | Low to Moderate (occasional painting) |
| Vinyl | Low | 20-30 | Low (minimal cleaning) |
| Wood | Medium-High to High | 20-40+ (depending on type and maintenance) | High (regular painting, staining, sealing) |
| Metal | Medium to High | 40-50+ | Low (minimal cleaning, occasional repainting) |
Vinyl Siding
Vinyl siding is a budget-friendly option known for its ease of installation and low maintenance. Pros include its resistance to moisture damage, insects, and rot. However, it can be easily damaged by impact and may fade or become brittle over time. Its aesthetic appeal is often considered less sophisticated than other materials. It’s a good choice for homeowners prioritizing affordability and low upkeep.
Wood Siding
Wood siding offers a classic, natural look and can significantly increase curb appeal. High-quality wood siding can last for decades with proper maintenance. However, it’s susceptible to rot, and insect damage, and requires regular painting or staining to prevent deterioration. This ongoing maintenance adds to the overall cost of ownership. Wood siding is a premium option best suited for homeowners willing to commit to regular maintenance.
Fiber Cement Siding (Other than Hardie Board)
While Hardie Board is a prominent brand, other fiber cement siding options exist. Like Hardie boards, these offer durability, fire resistance, and pest resistance. They generally require less maintenance than wood but may be more expensive than vinyl. The aesthetic versatility is similar to Hardie Board, offering a variety of textures and colors.
Metal Siding
Metal siding, often made of aluminum or steel, is incredibly durable and resistant to fire, insects, and rot. It’s a low-maintenance option with a long lifespan. However, it can be more expensive than vinyl or wood and may dent or scratch easily. Its modern aesthetic might not appeal to all homeowners. It’s a solid choice for homeowners seeking longevity and minimal upkeep.
Decision-Making Flowchart for Siding Replacement
This flowchart simplifies the siding selection process:
[Imagine a simple flowchart here. The flowchart would start with a central question: “What is your budget?”. Branches would lead to different options based on budget (low, medium, high). Each budget branch would then further branch based on the desired maintenance level (low, medium, high). The final leaves of the flowchart would be the recommended siding materials (vinyl for low budget/low maintenance, wood for high budget/high maintenance, etc.). The flowchart would visually represent the decision-making process based on budget and maintenance preferences.]
Cost of Replacement
Replacing Hardie board siding is a significant investment, and understanding the cost breakdown is crucial for budgeting and planning. The total expense will vary considerably depending on several factors, so it’s essential to get multiple quotes from reputable contractors.
The overall cost typically includes materials, labor, and permits. Material costs depend on the type of Hardie board chosen (e.g., lap siding, shingles, panels), its color, and the quantity needed, which is directly related to your home’s size and the complexity of its design. Labor costs are influenced by the contractor’s rates, the project’s complexity (e.g., intricate trim work, removal of old siding), and the time required for the job. Permits are a necessary expense, varying by location and the scope of the project.
Material Costs, Replace Hardie board siding.
Material costs represent a substantial portion of the total expense. The price per square foot of Hardie board siding can range from $2 to $6 or more, depending on the type and finish selected. A1,500-square-foott home might require between 1,500 and 2,000 square feet of siding to account for waste and cuts, resulting in material costs ranging from $3,000 to $12,000 or more. Additional materials like flashing, trim, and fasteners will add to this cost. Choosing a popular color might slightly increase the price due to higher demand.
Labor Costs
Labor costs are usually calculated per square foot and can range from $2 to $8 or more, depending on the region, the contractor’s experience, and the complexity of the installation. For a 1,500-square-foot home, labor costs could range from $3,000 to $12,000. This does not include the demolition of the old siding, which could add significantly to the labor bill. More intricate designs, such as many dormers or complex trim details, will increase labor costs.
Permit Costs
Permitting fees vary widely depending on your location. Some areas have higher fees than others, and the scope of the project can also affect the cost. It’s best to contact your local building department to get an estimate for the permit fees. Expect to pay anywhere from a few hundred dollars to potentially over a thousand dollars for necessary permits.
Factors Influencing Overall Cost
Several factors significantly impact the final cost. The size of your home is a primary driver, with larger homes naturally requiring more materials and labor. The complexity of your home’s design, including numerous angles, dormers, or intricate trim, will increase both material and labor costs. Your geographic location plays a role, as labor rates and material availability can vary considerably across different regions. Finally, the contractor you choose will also impact the price. Getting multiple quotes is essential to compare prices and services.
Cost-Saving Measures
Several strategies can help minimize costs. Opting for a less expensive grade of Hardie board or a simpler color might reduce material expenses. Scheduling the project during the off-season (typically fall or winter) may result in lower labor rates as contractors might have more availability. Preparing the site yourself (e.g., removing old siding) can also lead to savings, but only if you’re comfortable undertaking this task. Finally, carefully comparing quotes from multiple contractors and understanding what each quote includes (e.g., material disposal) is crucial for finding the best value. For example, a homeowner in a smaller home (800 square feet) might see a total replacement cost ranging from $8,000 to $16,000, while a larger home (3,000 square feet) could easily see costs exceeding $30,000.
Replacement Process
Replacing Hardie board siding is a significant undertaking, but with careful planning and execution, it can be a successful DIY project or a smoothly managed professional job. The process involves several key steps, from initial assessment to final cleanup. Understanding these steps will help you manage the project effectively, whether you’re tackling it yourself or overseeing a contractor.
The entire process can be broken down into a series of manageable phases. Proper preparation is crucial for a long-lasting and aesthetically pleasing result. Remember to always prioritize safety and wear appropriate personal protective equipment (PPE) throughout the project.
Surface Preparation
Before installing new siding, thorough surface preparation is essential. This step ensures proper adhesion and prevents future problems. Neglecting this stage can lead to issues like peeling paint, gaps in the siding, and reduced longevity of the new installation.
- Remove Existing Siding: Carefully remove the old Hardie board siding, starting from the bottom and working your way up. Use a pry bar and hammer, taking care not to damage the underlying sheathing. Dispose of the old siding responsibly, following local regulations for construction waste.
- Inspect and Repair Sheathing: Once the old siding is removed, thoroughly inspect the underlying sheathing for any damage, rot, or insect infestation. Repair or replace any damaged sections using appropriate materials. Ensure the sheathing is clean, dry, and level before proceeding.
- Clean the Surface: Remove any loose debris, dirt, dust, or old caulking from the sheathing. A wire brush or pressure washer can be helpful for this step. Allow the surface to dry completely before applying any primers or sealants.
- Prime (if necessary): Depending on the condition of the sheathing and the type of new siding being installed, a primer may be necessary to ensure proper adhesion and prevent moisture absorption. Apply a high-quality primer according to the manufacturer’s instructions.
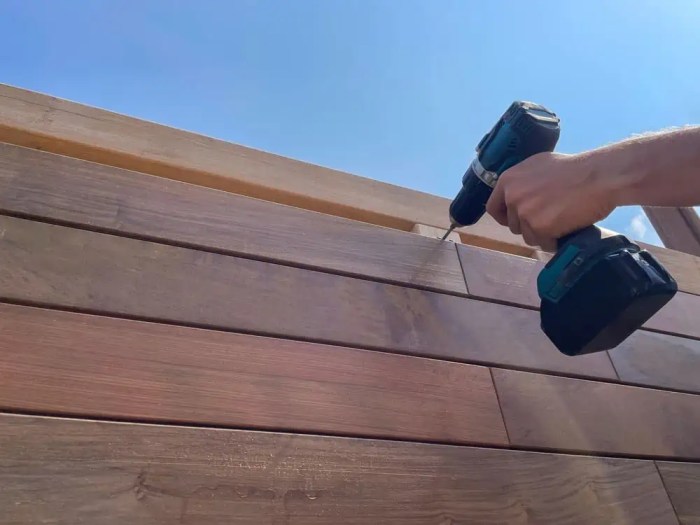
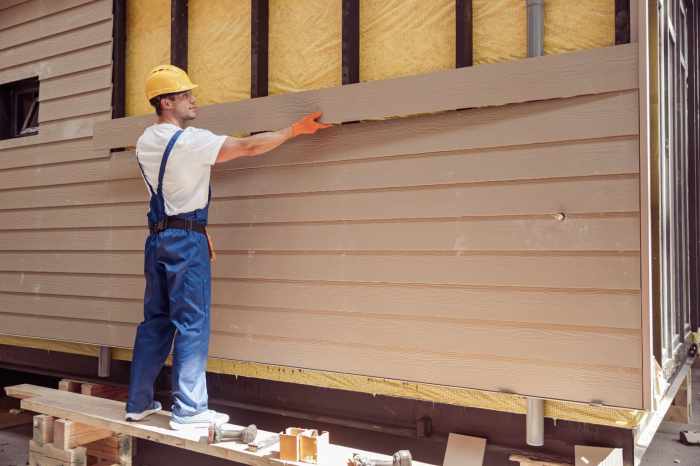
Siding Installation
Installing the new Hardie board siding requires careful attention to detail to ensure a watertight and aesthetically pleasing finish. Accurate measurements and proper fastening are crucial for a successful installation.
- Install Starter Strip: Begin by installing a starter strip along the bottom of the wall. This provides a level base for the first row of siding and helps maintain consistent spacing.
- Install First Row of Siding: Carefully install the first row of siding, ensuring it’s level and properly aligned with the starter strip. Use appropriate fasteners and spacing as recommended by the manufacturer.
- Install Subsequent Rows: Continue installing subsequent rows of siding, overlapping each row according to the manufacturer’s specifications. Maintain consistent spacing and alignment throughout the installation process.
- Cut and Fit Siding Around Windows and Doors: Carefully measure and cut the siding to fit around windows and doors. Use a miter saw for precise cuts and ensure proper flashing and sealing to prevent water intrusion.
- Install Trim and Accessories: Install any necessary trim pieces, such as corner boards, J-channel, and window/door trim. Ensure these pieces are properly aligned and sealed to prevent water leakage.
Final Cleanup
Once the siding installation is complete, a thorough cleanup is essential to leave the area looking neat and tidy. Proper disposal of waste materials is also important for environmental responsibility.
- Remove Debris: Remove all debris, including leftover siding, fasteners, and packaging materials, from the work area.
- Clean Up Spills: Clean up any spills of paint, primer, or sealant. Use appropriate solvents or cleaners according to the manufacturer’s instructions.
- Dispose of Waste Properly: Dispose of all waste materials responsibly, following local regulations for construction waste.
Maintenance and Care of Replacement Siding
Proper maintenance is key to extending the lifespan of your new siding and preserving its aesthetic appeal. Different siding materials require different care routines, and neglecting these can lead to costly repairs down the line. Understanding these differences and establishing a preventative maintenance schedule will save you time, money, and frustration in the long run.
Vinyl Siding Maintenance
Vinyl siding is generally low-maintenance, but regular cleaning prevents dirt and grime buildup that can dull its appearance.
- Clean your vinyl siding at least once or twice a year using a garden hose with a nozzle and a mild detergent solution. Avoid harsh chemicals or abrasive cleaners.
- Inspect the siding regularly for any damage, such as cracks, holes, or loose panels. Repair or replace damaged sections promptly to prevent further deterioration.
- For stubborn stains, consider using a soft-bristled brush and a solution of trisodium phosphate (TSP) following the manufacturer’s instructions carefully. Always rinse thoroughly.
Wood Siding Maintenance
Wood siding requires more frequent and intensive maintenance than vinyl. Regular cleaning and protective treatments are essential to prevent rot, insect infestation, and fading.
- Clean wood siding annually with a pressure washer using a low-pressure setting to avoid damaging the wood. A mild detergent solution can be used for tougher stains.
- Apply a high-quality wood sealant or stain every 2-3 years to protect the wood from moisture and UV damage. Choose a product appropriate for the type of wood used.
- Inspect for signs of rot, insect damage, or warping. Repair or replace damaged sections immediately to prevent further spread.
- Regularly check for loose nails or screws and tighten or replace them as needed.
Fiber Cement Siding Maintenance
Fiber cement siding is durable and low-maintenance, but it still benefits from periodic cleaning and inspection.
- Clean fiber cement siding annually with a garden hose and a mild detergent solution. A soft-bristled brush can be used for stubborn dirt.
- Inspect for any cracks, chips, or damage. Minor damage can often be repaired with caulk or patching compound. Larger damage may require professional repair or replacement.
- Avoid using abrasive cleaners or power washers at high pressure, as these can damage the surface.
Metal Siding Maintenance
Metal siding is extremely durable and requires minimal maintenance. However, regular inspection is still recommended.
- Clean metal siding annually with a garden hose and a mild detergent solution. A soft brush can be used for tougher stains.
- Inspect for any signs of rust, dents, or damage. Minor dents can often be repaired, but significant damage may require professional help.
- Ensure proper drainage around the foundation to prevent water accumulation against the siding.
Potential Issues After Siding Replacement and Solutions
Several issues can arise after siding replacement, even with high-quality materials and professional installation. Early detection and prompt action are crucial to prevent escalation.
- Water Leaks: Inspect all seams and joints for leaks, particularly after heavy rain. Caulk any gaps or cracks immediately. Persistent leaks may require professional attention.
- Loose or Damaged Panels: Regularly check for loose panels or signs of damage. Tighten loose fasteners or replace damaged panels as needed.
- Mold or Mildew Growth: Clean any mold or mildew promptly using a solution of bleach and water (following safety precautions). Address underlying moisture problems to prevent recurrence.
- Insect Infestation: Inspect for signs of insect activity, especially around wood siding. Treat infestations promptly using appropriate insecticides and seal any entry points.
Preventative Maintenance Checklist
A regular preventative maintenance schedule significantly extends the life of your new siding.
- Annual Cleaning: Clean all siding surfaces at least once a year using appropriate methods for the material.
- Semi-Annual Inspection: Inspect siding for damage, loose fasteners, or signs of water intrusion every six months.
- Regular Caulk Inspection and Repair: Check caulking around windows, doors, and other openings for cracks or gaps and re-caulk as needed.
- Gutter and Downspout Maintenance: Ensure gutters and downspouts are clean and functioning properly to prevent water damage.
- Landscaping Maintenance: Keep landscaping trimmed away from the siding to prevent moisture buildup and damage.
Finding and Hiring a Contractor
Source: advanceroofingllc.com
Replacing your Hardie board siding is a significant investment, and choosing the right contractor is crucial for a successful project. A well-chosen contractor ensures quality workmanship, adheres to timelines, and provides excellent customer service. Making the wrong choice can lead to costly mistakes, delays, and significant frustration.
Finding a qualified and reputable siding contractor requires careful research and due diligence. Don’t rush the process; take your time to thoroughly vet potential candidates to ensure a smooth and successful siding replacement.
Contractor Qualification Verification
It’s essential to verify a contractor’s qualifications before engaging in their services. This includes checking their licensing and insurance, confirming their experience with Hardie board siding, and reviewing online reviews and testimonials from past clients. Look for contractors with a proven track record of successful projects and positive customer feedback. Checking their licensing ensures they are legally operating and adhering to industry standards. Adequate insurance protects you from liability in case of accidents or damages during the project. Confirming their experience with Hardie board is vital because it’s a specific type of siding that requires specialized knowledge and skills.
Obtaining and Comparing Multiple Bids
Getting at least three bids from different contractors is a standard practice. This allows for a fair comparison of pricing, proposed timelines, and the overall scope of work. Make sure the bids are detailed and include all materials and labor costs, so you can accurately compare apples to apples. A bid that seems significantly lower than others might indicate a lack of experience, subpar materials, or hidden costs that could surface later. Consider the contractor’s reputation and experience alongside price. A slightly higher bid from a reputable contractor may be a better investment in the long run than a cheaper option with potential risks. For example, a contractor with a history of excellent reviews and a long-standing business might charge more but provide superior service and a higher-quality finished product.
Key Questions to Ask Potential Contractors
Before committing to a contractor, ask specific questions to assess their understanding of the project and their approach to the work. Clarifying expectations upfront prevents misunderstandings and potential disputes later. For instance, inquiring about their experience with Hardie board installation, their project management process, and their warranty policies provide valuable insight into their professionalism and commitment to quality. Asking about their preferred payment schedule and their contingency plans for unexpected issues demonstrates their preparedness and financial stability.
Visual Examples of Hardie Board Replacement
Seeing is believing, and when it comes to home improvement projects as significant as siding replacement, visual examples can be incredibly helpful. This section showcases three distinct scenarios illustrating the transformation possible when replacing Hardie board siding. Each example details the “before” and “after” appearances, the chosen replacement material, and the reasons behind the upgrade.
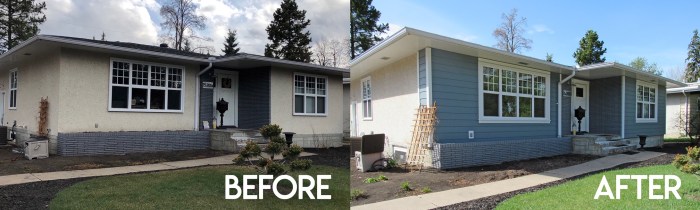
Scenario 1: Moisture Damage and Aesthetic Upgrade
Before: The original Hardie board siding on this 1950s ranch house showed significant signs of moisture damage. Years of exposure to the elements had caused discoloration, warping, and cracking in several areas, particularly around the windows and foundation. The original color was a faded, somewhat drab light green. The overall appearance was dated and unappealing.
After: The damaged Hardie board was completely removed and replaced with vinyl siding in a warm, modern gray tone. The new siding is smooth, providing a clean, contemporary look that complements the home’s architectural style. The updated appearance significantly enhanced the home’s curb appeal and market value. The choice of vinyl was driven by its moisture resistance and lower cost compared to other options, while still achieving a desired aesthetic.
Scenario 2: Severe Storm Damage and Material Choice
Before: A severe hail storm caused extensive damage to the Hardie board siding of a two-story colonial home. Numerous dents, punctures, and cracks were visible across the entire facade. The damage was not only unsightly but also compromised the home’s weather protection. The original siding was a dark brown, and the damage made the variations in shading more noticeable.
After: Instead of replacing with Hardie board again, the homeowners opted for a fiber cement alternative, but in a lighter, more neutral gray color. This material offered superior impact resistance compared to the original Hardie board. The new siding’s consistent color and smooth finish created a more unified and visually appealing look. The choice reflected a desire for greater durability and a less maintenance-intensive material.
Scenario 3: Updating a Dated Exterior
Before: A 1980s split-level home featured original Hardie board siding in a bold, reddish-brown tone that was no longer in style. While the siding itself was in good condition, the color and texture felt dated and clashed with the surrounding neighborhood’s more contemporary aesthetics.
After: The existing Hardie board was retained but repainted in a soft, creamy white with dark gray accents around the windows and trim. This simple color change, coupled with the addition of new window shutters, completely transformed the home’s exterior. The updated color palette gave the home a fresh, clean, and more modern feel, demonstrating how a simple change in color can dramatically alter the aesthetic. The choice to repaint instead of replace was driven by the cost savings and the good condition of the existing siding.
Aesthetic Considerations in Siding Material Selection
Choosing a replacement siding material involves more than just durability and cost. Aesthetic considerations play a vital role in enhancing a home’s curb appeal and overall value. Factors to consider include:
* Color: Siding color significantly impacts the home’s appearance. Consider the surrounding environment, architectural style, and personal preferences. Neutral colors are generally versatile, while bolder colors can create a statement.
* Texture: Siding textures range from smooth to rough, mimicking natural materials like wood or stone. The texture chosen should complement the home’s architectural style and overall design.
* Style: Siding styles vary greatly, from traditional clapboard to modern horizontal panels. The chosen style should enhance the home’s architectural features and create a cohesive look.
End of Discussion
Replacing Hardie board siding is a significant home improvement project, but with careful planning and the right information, it can be a rewarding experience. From understanding the reasons for replacement to choosing the ideal material and finding a skilled contractor, this guide has equipped you with the knowledge to navigate this process confidently. Remember to prioritize thorough research, obtain multiple bids, and meticulously plan each step to ensure a successful and aesthetically pleasing outcome. Your updated home exterior will be a testament to your diligent efforts!
Common Queries
Can I replace Hardie’s board siding myself?
While possible for smaller areas, replacing Hardie board siding is a labor-intensive job best left to professionals for larger projects. It requires specialized tools and expertise to ensure proper installation and avoid costly mistakes.
How long does Hardie board siding replacement take?
The timeframe varies depending on the home’s size and complexity. Expect several days to several weeks for a complete replacement.
What is the warranty on replacement siding?
Warranty periods differ depending on the manufacturer and material. Always check the manufacturer’s specifications for details.
What about permits for siding replacement?
Most localities require permits for exterior renovations. Check with your local building department before starting the project.
How do I dispose of old Hardie board siding?
Contact your local waste management facility for guidance on the proper disposal of asbestos-containing materials (if applicable). Some areas have specific regulations for construction waste.