Cedar Siding Repair Cost A Comprehensive Guide
Cedar siding repair costs can vary wildly, depending on several factors. Understanding these factors is key to budgeting effectively for your project. This guide will walk you through everything you need to know, from assessing the damage and choosing repair methods to finding a reliable contractor and preventing future problems. We’ll cover the costs associated with different types of repairs, materials, and labor, providing you with the information you need to make informed decisions.
We’ll explore the impact of damage extent, siding type (bevel, clapboard, shingle), geographic location, and the age and condition of your siding. We’ll also delve into DIY versus professional repair options, outlining the steps involved in common repairs and providing cost estimates. Finally, we’ll discuss preventative maintenance to keep your cedar siding looking its best for years to come.
Factors Influencing Cedar Siding Repair Cost
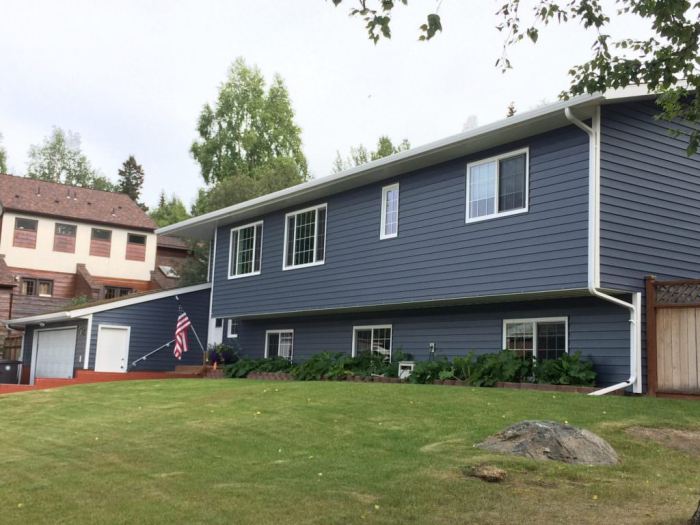
Source: octanecdn.com
Cedar siding repair costs can vary significantly depending on several factors. Understanding these factors will help you budget effectively and avoid unexpected expenses. This section will break down the key influences on the final price.
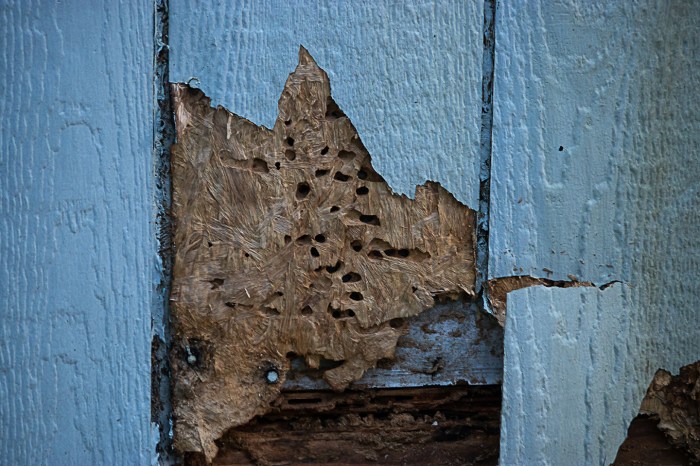
Extent of Damage
The most significant factor determining repair cost is the extent of the damage. Minor repairs, such as replacing a few damaged boards due to weathering or insect damage, will be considerably cheaper than major repairs involving extensive rot, water damage, or storm damage requiring large-scale replacement. A small area of repair might only need a few boards and a couple of hours of labor, while widespread damage could necessitate the removal and replacement of large sections of siding, potentially involving scaffolding and specialized equipment.
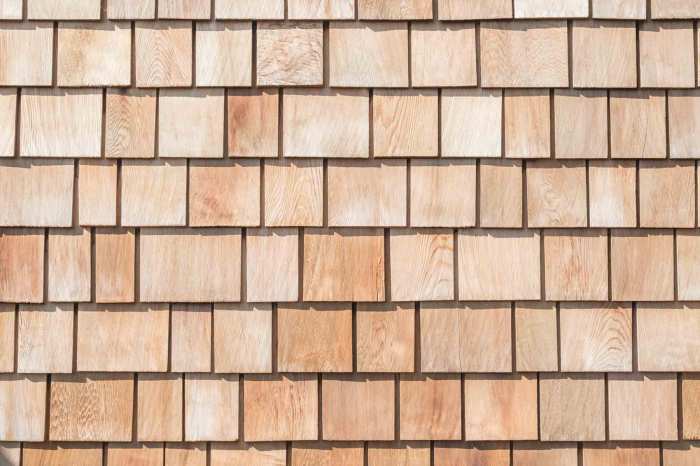
Cedar Siding Type
Different types of cedar siding influence cost. Bevel siding, with its overlapping boards, is generally less expensive to repair than clapboard siding, which requires more precise fitting. Cedar shingles, especially hand-split ones, are often the most expensive to repair due to their unique installation and higher material costs. The complexity of the siding profile directly impacts labor time and material requirements.
Labor Costs versus Material Costs
Repair costs are a combination of labor and materials. Labor typically accounts for a significant portion (often 50-70%) of the total cost. Factors such as the accessibility of the damaged area, the complexity of the repair, and the contractor’s hourly rate all affect labor costs. Material costs depend on the type of cedar siding, the quantity needed, and any additional materials like nails, sealant, or primer. For example, replacing a single damaged board might cost $20 in materials but $50 in labor.
Geographic Location
Geographic location plays a role in both labor and material costs. Labor rates vary significantly across regions, with higher costs in areas with a high cost of living. Material costs can also vary due to transportation expenses and local supplier pricing. For instance, cedar siding might be more expensive in regions where it’s not locally sourced.
Age and Condition of Siding
The age and overall condition of the siding impact repair costs. Older siding may require more extensive repairs due to accumulated weathering, insect damage, or rot. This can significantly increase both labor and material costs. Pre-existing issues like poor installation can also complicate repairs and drive up expenses. For example, repairing rotted siding will be more expensive than simply replacing a few damaged boards due to normal wear and tear.
Repair Cost Comparison: Minor vs. Major Damage, Cedar siding repair cost
| Damage Type | Labor Cost (Estimate) | Material Cost (Estimate) | Total Cost (Estimate) |
|---|---|---|---|
| Minor (single board replacement) | $50 – $100 | $20 – $40 | $70 – $140 |
| Moderate (several boards, localized damage) | $200 – $500 | $100 – $300 | $300 – $800 |
| Major (extensive rot, large area replacement) | $1000 – $3000+ | $500 – $1500+ | $1500 – $4500+ |
| Severe (storm damage, significant structural issues) | $3000+ | $1500+ | $4500+ |
Repair Methods and Associated Costs
Repairing cedar siding can range from simple fixes to extensive overhauls, significantly impacting the overall cost. The approach depends on the extent of damage, the homeowner’s DIY skills, and the chosen materials. Understanding the various methods and their associated costs is crucial for budgeting and planning your project.
Replacing Individual Cedar Siding Boards
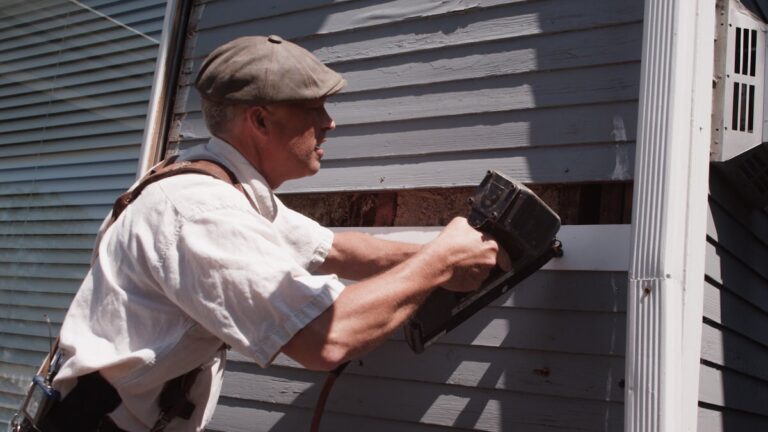
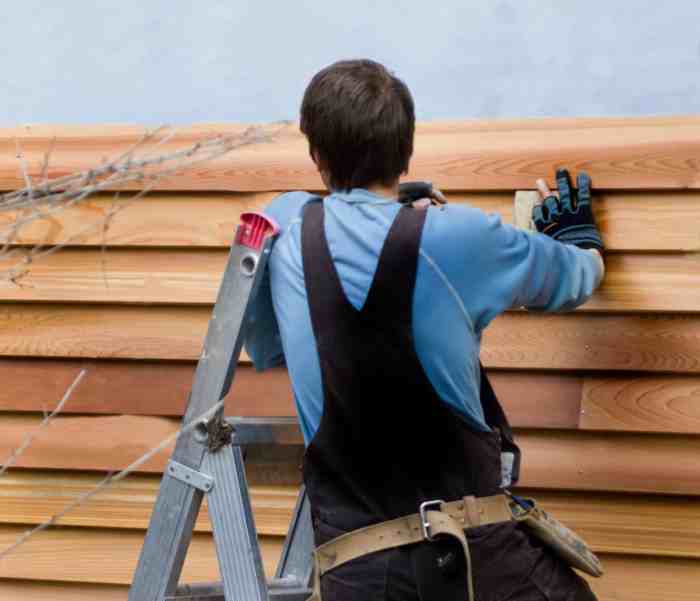
Replacing individual boards is often the solution for minor damage like cracks or warping. This involves carefully removing the damaged board, ensuring you don’t harm surrounding pieces. A new board, pre-cut to size and matching the existing siding profile, is then installed using appropriate nails or screws. Labor costs will vary based on location and contractor experience, but expect to pay anywhere from $25 to $75 per board, plus the cost of the replacement material (approximately $5-$20 per board, depending on the quality and size). This price also incorporates the cost of disposal of the old board.
Repairing Rotted or Damaged Sections
More extensive damage, such as rot or insect infestation, requires a different approach. The affected area must be completely removed down to sound wood, carefully cleaning the surrounding area to prevent further spread. The gap can then be filled with wood filler, epoxy, or a composite repair material. Wood filler is a less expensive option ($5-$15 per container), but may not be as durable as epoxy ($10-$30 per container) which offers superior strength and water resistance. Composite repair materials provide a good balance of cost and durability. The repaired area needs to be sanded smooth and then matched to the existing finish. Labor costs for this type of repair will likely be higher, ranging from $50 to $150 per square foot, depending on the complexity of the repair and the amount of material needed.
Comparing Repair Materials
The choice of repair material significantly impacts cost. Wood filler is the cheapest, suitable for minor imperfections, but less durable than epoxy. Epoxy is more expensive but provides a stronger, more water-resistant bond. Composite materials, often a blend of wood fibers and resins, offer a balance between cost and performance, generally falling in the middle price range. For large areas, using matching cedar planks might be the most visually appealing and durable solution but this would fall under the category of replacing individual boards, described above.
Repainting or Restraining Cedar Siding After Repairs
After repairs, repainting or restaining is usually necessary to maintain the siding’s appearance and protect it from the elements. The cost depends on the size of the area, the type of paint or stain used, and whether you hire a professional or DIY. Expect to pay anywhere from $1 to $5 per square foot for professional painting or staining, while DIY will significantly reduce labor costs, though you may spend more on materials. High-quality exterior paints and stains are more expensive but offer better longevity and protection.
DIY vs. Professional Repair Costs
DIY repairs can save money on labor costs, but may result in higher material costs due to potential mistakes or the need to purchase additional supplies. For simple repairs, a homeowner with some experience may save significantly. However, complex repairs or large areas are best left to professionals, who possess the expertise and equipment to ensure a quality repair. A professional will also handle waste disposal.
Steps for a Common Cedar Siding Repair Scenario: Cost Estimates
Before outlining the steps, it’s important to note that these are estimates and actual costs can vary based on location, materials used, and labor rates.
- Assessment of Damage: Free (if you do it yourself), or $50-$100 for a professional inspection.
- Material Purchase: $20-$100 (depending on the extent of the damage and materials used).
- Removal of Damaged Section: Included in labor costs (if hiring a professional), or free (if DIY).
- Repair/Replacement: $50-$150 (depending on the complexity of the repair, the material used, and whether it’s a simple repair or board replacement).
- Finishing (Sanding, Priming, Painting/Staining): $50-$200 (depending on the size of the area and the type of finish used).
- Clean-up: Included in labor costs (if hiring a professional), or free (if DIY).
Finding and Hiring a Contractor for Cedar Siding Repair: Cedar Siding Repair Cost

Source: sidingcost.org
Finding the right contractor is crucial for a successful and cost-effective cedar siding repair. A poorly chosen contractor can lead to shoddy workmanship, cost overruns, and ongoing problems. Taking the time to thoroughly vet potential contractors will save you headaches and money in the long run.
Identifying Qualified and Reputable Contractors
Start your search by asking for referrals from friends, family, and neighbors who have had similar work done. Online resources like the Better Business Bureau (BBB) and Angie’s List can also provide valuable information, including customer reviews and ratings. Look for contractors with specific experience in cedar siding repair; this specialized knowledge is essential for achieving optimal results. Check their websites and social media profiles for examples of their previous work, ensuring the quality aligns with your expectations. Consider contractors who are members of relevant professional organizations, signifying a commitment to industry best practices.
Contractor Question Checklist
Before committing to any contractor, it’s essential to ask specific questions to assess their qualifications and approach. This ensures a clear understanding of the project scope, timeline, and potential challenges. A comprehensive checklist should include inquiries about their experience with cedar siding, licensing, and insurance, their proposed repair methods, the materials they intend to use, their warranty offerings, and their payment schedule. Also, confirm their availability and expected project duration. Asking about their process for handling unforeseen issues is equally important.
The Importance of Multiple Quotes
Obtaining multiple quotes from different contractors is paramount. Comparing quotes allows you to assess the range of prices and services offered. Don’t solely focus on the lowest price; consider the overall value proposition, including the contractor’s reputation, experience, and proposed methods. Ensure all quotes are based on the same scope of work to facilitate a fair comparison. This competitive bidding process protects you from inflated pricing and ensures you get the best value for your investment.
Reviewing Contractor Licenses and Insurance
Verify that the contractor holds the necessary licenses and insurance to operate legally and protect you from liability. Contact your local licensing board to confirm the validity of their license and check for any complaints filed against them. Adequate liability insurance protects you in case of accidents or damage to your property during the repair process. Workers’ compensation insurance protects the contractor’s employees, further mitigating your risk. Request copies of their insurance certificates to verify coverage.
Sample Cedar Siding Repair Contract
A well-drafted contract protects both the homeowner and the contractor. Key clauses should include a detailed description of the work to be performed, a precise timeline for completion, the agreed-upon price, payment schedule (often staggered payments tied to project milestones), a clear description of the materials to be used, a warranty on the workmanship and materials, and a dispute resolution mechanism. The contract should alsoArticulatel the responsibilities of both parties and specify penalties for late completion or substandard work. For example, a clause could stipulate a daily penalty for delays beyond a reasonable timeframe. A sample clause might read:
“Contractor agrees to complete the cedar siding repair within 30 days of the commencement date. For each day of delay beyond the 30-day period, Contractor shall pay Homeowner a penalty of $100.”
Red Flags When Selecting a Contractor
Several red flags should prompt you to reconsider hiring a contractor. These include contractors who are unwilling to provide references or proof of insurance, those who pressure you into making a quick decision, those with vague or incomplete proposals, those who consistently offer the lowest price without a clear justification, and those who are unresponsive or difficult to communicate with. Avoid contractors who lack professionalism or seem dismissive of your concerns. Furthermore, be wary of contractors who require full payment upfront before starting the work. A reasonable payment schedule typically involves a down payment followed by progress payments tied to completed stages of the project.
Maintenance and Prevention of Cedar Siding Damage
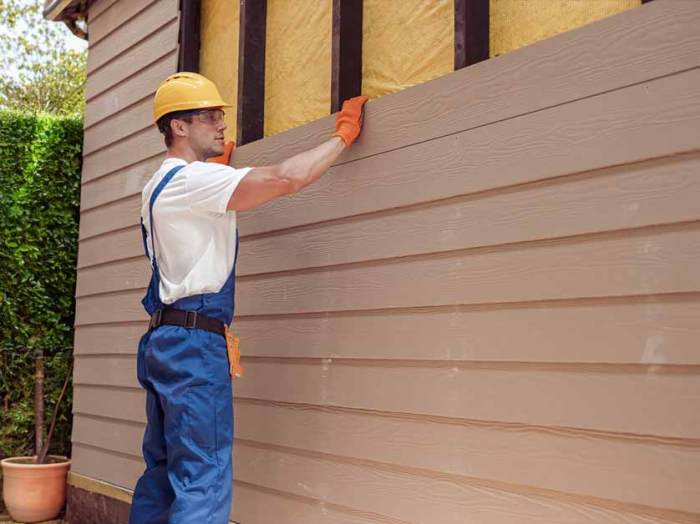
Source: homeguide.com
Regular maintenance is key to extending the lifespan of your cedar siding and avoiding costly repairs. By proactively addressing potential issues, you can significantly reduce the risk of water damage, rot, and insect infestation, preserving the beauty and value of your home. This involves a combination of cleaning, sealing, and regular inspections.
Cedar Siding Cleaning
Proper cleaning removes dirt, mildew, and other debris that can compromise the siding’s protective layers and lead to premature deterioration. A gentle approach is crucial to avoid damaging the delicate cedar wood. Begin by rinsing the siding thoroughly with a garden hose, using a low-pressure nozzle to avoid forceful water streams. For stubborn dirt or mildew, mix a solution of mild detergent (like dish soap) and water. Apply this solution using a soft-bristled brush, scrubbing gently in the direction of the wood grain. Rinse thoroughly again with clean water, ensuring all soap residue is removed. Allow the siding to air dry completely before applying any sealant. A visual representation would show a person using a soft brush with a gentle, sweeping motion, working from top to bottom on a section of cedar siding, followed by thorough rinsing with a low-pressure hose. The image would highlight the gentle nature of the cleaning process.
Importance of Sealing Cedar Siding
Applying a high-quality wood sealant is a crucial preventative measure. Sealants protect the wood from moisture absorption, preventing rot and decay. They also help to protect against UV damage from sunlight, which can lead to fading and cracking. Choose a sealant specifically designed for exterior use and cedar wood. Consider using a water-repellent sealant that allows the wood to breathe, preventing moisture buildup beneath the surface. Regular resealing, typically every 2-3 years depending on climate and exposure, is recommended to maintain protection.
Preventative Measures Against Water Damage and Rot
Water damage is the primary cause of cedar siding deterioration. Proper drainage is essential. Ensure gutters and downspouts are clean and functioning correctly to divert water away from the foundation and siding. Regularly inspect for any gaps or cracks around windows and doors, promptly sealing them to prevent water infiltration. Proper ventilation in attics and crawl spaces is also important to prevent moisture buildup. Addressing these issues proactively minimizes the risk of significant damage and costly repairs. A well-maintained drainage system, combined with careful sealing around openings, significantly reduces the likelihood of water intrusion and subsequent rot.
Regular Inspection of Cedar Siding
Regular visual inspections are crucial for the early detection of problems. Inspect your siding at least twice a year, in spring and fall. Look for signs of damage such as cracks, warping, discoloration, insect infestation (evidence of holes or sawdust), and loose or missing pieces. Pay close attention to areas prone to moisture accumulation, such as around windows, doors, and ground level. Early detection allows for timely repairs, preventing minor issues from escalating into major problems. For example, a small crack identified early can be easily repaired, while ignoring it could lead to significant water damage and extensive replacement costs.
Applying a Protective Sealant
Before applying a sealant, ensure the siding is clean and completely dry. Apply the sealant using a brush or roller, working in thin, even coats. Follow the manufacturer’s instructions regarding drying time between coats. Apply the sealant in the direction of the wood grain for optimal penetration and even coverage. Focus on ensuring complete coverage, particularly in areas prone to moisture exposure. Allow sufficient drying time before exposing the treated area to rain or moisture. A properly applied sealant provides a protective barrier, extending the life of your cedar siding.
Last Point
Source: cloudfront.net
Repairing cedar siding can be a significant investment, but understanding the costs involved allows for better planning and budgeting. By carefully considering the factors Artikel in this guide – from assessing damage and selecting appropriate repair methods to finding a qualified contractor and implementing preventative maintenance – you can ensure a successful and cost-effective repair project. Remember to always get multiple quotes and thoroughly vet any contractor before starting work. With proper planning and care, your cedar siding can remain a beautiful and durable feature of your home for many years.
FAQ Resource
What is the average cost range for cedar siding repair?
Costs vary greatly depending on the factors discussed above, but expect to pay anywhere from a few hundred dollars for minor repairs to several thousand for extensive damage.
How long does a cedar siding repair typically take?
This depends on the size and complexity of the repair. Minor repairs might take a day or two, while major repairs could take several days or even weeks.
Can I get insurance to cover cedar siding repair?
Possibly, depending on your policy and the cause of the damage. Check with your insurance provider to see if your policy covers damage from weather, accidents, or other covered events.
What is the best time of year to repair cedar siding?
Spring or fall are generally ideal, as these seasons offer moderate temperatures and lower humidity, which are conducive to paint and stain drying.
How often should I inspect my cedar siding?
At least twice a year – once in spring and once in fall – to check for damage, rot, or insect infestation.