How Much to Replace Vinyl Siding with Brick?
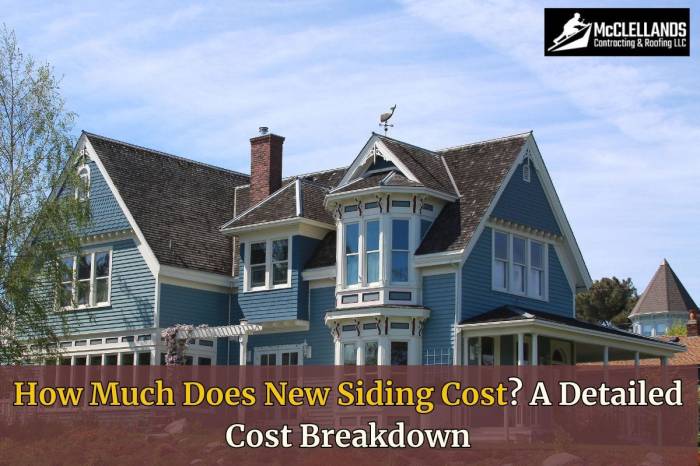
How much to replace vinyl siding with brick? That’s a question many homeowners ask, considering the significant aesthetic and durability upgrade. This guide breaks down the costs involved, from material selection and labor to permits and long-term maintenance. We’ll explore various brick types, installation methods, and contractor considerations to help you budget effectively for this transformative home improvement project.
Replacing vinyl siding with brick is a substantial undertaking, impacting both the visual appeal and the long-term value of your home. Understanding the cost factors involved is crucial for successful planning and execution. This involves careful consideration of material costs (brick type, mortar, etc.), labor expenses (demolition, installation), and the potential for unforeseen complications. We’ll cover everything you need to know to make an informed decision.
Cost Factors Influencing Vinyl to Brick Siding Replacement

Source: belkcustombuilders.com
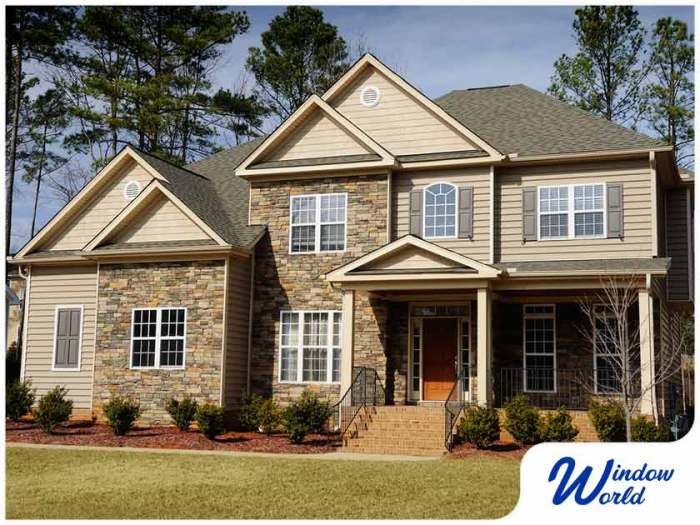
Replacing vinyl siding with brick is a significant home improvement project with a substantial price tag. Several factors influence the final cost, making accurate budgeting crucial before starting. Understanding these variables will help you make informed decisions and avoid unexpected expenses.
Brick Types and Pricing
The type of brick you choose dramatically affects the overall cost. Manufactured bricks, mass-produced in factories, are generally the most affordable option. They offer a consistent look and are readily available in various colors and textures. However, reclaimed bricks, salvaged from demolished buildings, command a higher price due to their unique character and historical significance. The cost difference can be substantial; reclaimed brick can easily be double or triple the price of newly manufactured brick. Hand-made bricks, crafted individually, represent the highest price point, reflecting the extensive labor involved in their creation. Consider the aesthetic you desire and your budget when making your selection.
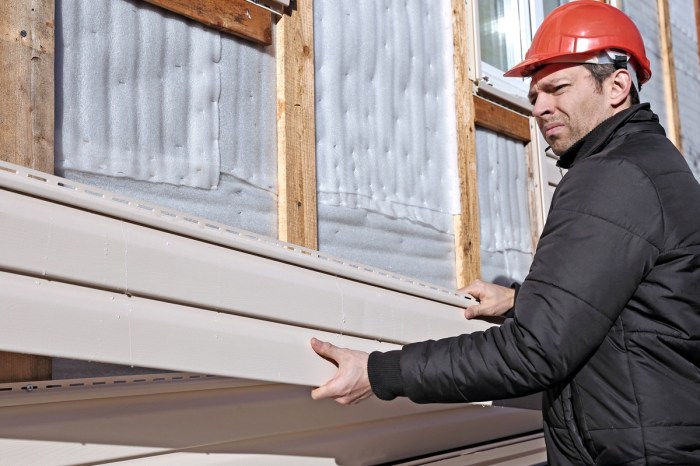
Labor Costs: Brick vs. Vinyl
Labor costs represent a significant portion of the total project expense. Removing vinyl siding is relatively straightforward and less labor-intensive compared to brick installation. Bricklaying is a skilled trade requiring experienced professionals. The complexity of the project, such as intricate detailing or extensive repairs to the underlying structure, will also increase labor costs. Expect to pay a higher hourly rate for experienced bricklayers compared to the contractors who remove vinyl siding. Obtaining multiple quotes from reputable contractors is recommended to compare pricing and ensure you’re getting a fair price for the labor involved.
Site Preparation Expenses
Site preparation is often overlooked but is a crucial and potentially costly phase. This includes the demolition of the existing vinyl siding, which might uncover underlying issues needing repair. Foundation work might be necessary to ensure a stable base for the new brick siding. This could involve repairing damaged sheathing, replacing rotted wood, or addressing any structural problems. In some cases, additional insulation might be required to improve energy efficiency. These unforeseen expenses can significantly inflate the total project cost, so a thorough inspection before starting is essential.
Cost Comparison Table
| Brick Type | Installation Method | Cost per Square Foot | Notes |
|---|---|---|---|
| Manufactured Brick | Standard Installation | $15 – $25 | Includes basic labor and materials. Price varies based on region and brick type. |
| Manufactured Brick | Complex Installation (e.g., intricate detailing) | $25 – $40 | Increased labor costs due to project complexity. |
| Reclaimed Brick | Standard Installation | $30 – $60 | Higher cost due to sourcing and handling reclaimed materials. |
| Handmade Brick | Standard Installation | $50 – $100+ | Significantly higher cost due to the labor-intensive nature of handmade bricks. |
Material Costs and Sourcing
Replacing vinyl siding with brick involves significant material costs, varying based on brick type, quantity needed, and regional availability. Understanding these costs is crucial for accurate budgeting and project planning. This section breaks down the expenses associated with materials and explores sourcing options, along with environmental considerations.
Brick Costs and Types
Brick prices fluctuate based on several factors. The type of brick—clay, concrete, or manufactured—significantly impacts cost. Clay bricks, known for their durability and aesthetic appeal, generally command higher prices than concrete bricks, which are often more affordable but may lack the same longevity. Manufactured bricks offer a range of options, with prices varying depending on their composition and appearance. For example, a standard clay brick might cost between $0.50 and $2.00 per brick, while a high-end, handcrafted clay brick could cost several dollars per brick. Concrete bricks typically range from $0.30 to $1.00 per brick, and manufactured bricks fall somewhere in between. These prices are estimates and will vary by region and supplier. Consider the cost per square foot, as well, which usually accounts for brick size, mortar, and waste. A typical range might be $10-$30 per square foot, depending on the factors mentioned.
Mortar, Flashing, and Other Components
Beyond the bricks themselves, you’ll need mortar to bind them together. Mortar costs vary depending on the type (cement-based, lime-based, etc.) and quantity needed. Expect to spend approximately $100-$200 per cubic yard of mortar. Flashing, crucial for preventing water damage, is another essential material. The cost of flashing depends on the material (aluminum, copper, etc.) and the project’s size, generally costing between $1 and $5 per linear foot. Additional materials include weep holes (small openings to allow moisture to escape), which might add another $50-$150 to the overall cost. Other potential expenses could include fasteners, sealants, and any necessary brick ties or anchors to secure the brick to the underlying structure.
Brick Availability and Sourcing
Sourcing bricks involves considering both availability and transportation costs. Clay bricks, especially those with unique characteristics or from specific regions, might be less readily available than concrete bricks, which are more commonly mass-produced. Local brickyards or suppliers are excellent starting points for sourcing materials, offering insights into regional options and potentially faster delivery times. Online retailers and larger building supply stores provide broader choices but may incur higher shipping costs. The geographic location significantly influences availability; rural areas might have fewer options compared to urban centers.
Environmental Impact of Brick Choices
The environmental impact of brick varies depending on the type and sourcing method. Clay brick production is energy-intensive, requiring high temperatures for firing. Concrete bricks have a lower carbon footprint due to lower energy requirements in their manufacturing process. Sourcing locally minimizes transportation emissions, reducing the overall environmental impact. Choosing reclaimed or recycled bricks further minimizes environmental impact by diverting waste from landfills. Consider the embodied carbon of the bricks, which refers to the greenhouse gas emissions associated with the entire lifecycle of the material, from extraction of raw materials to manufacturing and transportation. Choosing sustainably sourced and manufactured bricks can reduce this footprint.
Material Cost Breakdown
| Material | Quantity (Estimate for the average home) | Unit Cost (Estimate) | Total Cost (Estimate) |
|---|---|---|---|
| Bricks (Clay) | 10,000 | $1.00 | $10,000 |
| Mortar | 1 cubic yard | $150 | $150 |
| Flashing | 100 linear feet | $2.50 | $250 |
| Weep Holes | 50 | $5 | $250 |
| Fasteners & Sealants | – | $200 | $200 |
| Total Estimated Material Cost | $10,850 |
Labor and Contractor Selection: How Much To Replace Vinyl Siding With Brick

Source: textureplus.com
Choosing the right contractor is crucial for a successful vinyl-to-brick siding replacement. This involves more than just finding the cheapest option; it’s about securing a team with the experience, skills, and reputation to deliver a high-quality, long-lasting result. This section will guide you through the process of finding and selecting the ideal contractor for your project.
Finding reputable and experienced contractors requires a multi-pronged approach. Start by asking for referrals from friends, family, and neighbors who have undertaken similar projects. Online resources such as review sites, professional associations (like the National Association of the Remodeling Industry or NARI), and local contractor directories can also be valuable tools. Look for contractors with proven experience in brick-siding installation and a strong track record of positive customer reviews. Check their licenses and insurance to ensure they’re operating legally and can cover potential liabilities. Don’t hesitate to contact previous clients for testimonials and references; a reputable contractor will readily provide them.
Contractor Selection Criteria
Selecting a contractor involves more than just comparing prices. You need to assess their experience, reputation, and communication style. Consider their understanding of your project’s scope, their proposed timeline, and their approach to dealing with potential challenges. A thorough assessment of these factors ensures a smooth and successful project. The following criteria are essential for a sound decision.
- Experience and Expertise: Look for contractors with a demonstrable history of completing brick siding projects. Inquire about the types of brick they’ve worked with and their experience handling various challenges (e.g., uneven surfaces, complex designs).
- Licensing and Insurance: Verify that the contractor is properly licensed and insured. This protects you from potential liability in case of accidents or unforeseen issues during the project.
- References and Testimonials: Request references from previous clients and contact them to inquire about their experiences with the contractor. Positive feedback indicates a reliable and trustworthy contractor.
- Detailed Proposal: A comprehensive proposal should Articulate the project scope, materials, timeline, payment schedule, and warranty information. A vague or incomplete proposal should raise red flags.
Obtaining and Comparing Multiple Bids
Getting multiple bids from different contractors is essential for ensuring you’re getting a fair price. Request detailed proposals that Articulate the scope of work, materials, and labor costs. Compare not only the total cost but also the specifics of each bid, paying close attention to the quality of materials proposed and the level of detail in the contractor’s plan. Don’t automatically choose the cheapest bid; consider the overall value and the contractor’s reputation. A slightly higher bid from a reputable contractor may be a better investment in the long run. For example, a bid that includes higher-quality brick and a more detailed project plan might cost more upfront but save you money and headaches down the line.
Project Timeline
The timeline for a vinyl-to-brick siding replacement varies greatly depending on the size of the house, the complexity of the design, weather conditions, and the contractor’s workload. However, a typical project might take anywhere from several weeks to several months. A detailed project schedule should be included in the contractor’s proposal. For instance, a small house with simple siding might take 4-6 weeks, while a large, multi-story house with intricate detailing could take 3-4 months or longer. Unexpected delays, such as material shortages or inclement weather, should be accounted for.
Essential Questions for Potential Contractors
Before hiring a contractor, it’s vital to ask specific questions to assess their capabilities and suitability for your project. This ensures clarity and avoids potential misunderstandings later. These questions are crucial for making an informed decision.
- What is your experience with brick siding installation, and can you provide examples of similar projects?
- Are you properly licensed and insured? Can you provide proof of your licenses and insurance certificates?
- Can you provide references from previous clients?
- What type of brick do you recommend for my project, and why?
- What is your proposed timeline for the project, and what factors could potentially delay completion?
- What is your payment schedule, and what guarantees or warranties do you offer?
- What is your process for handling unforeseen issues or changes during the project?
Permits and Regulations
Replacing your vinyl siding with brick is a significant home improvement project, and navigating the permitting process is crucial for a smooth and legal renovation. Failing to obtain the necessary permits can lead to hefty fines, project delays, and even the need to undo completed work. Understanding the requirements and procedures in your area is essential before you begin.
Securing the necessary permits involves several steps and considerations, varying depending on your location and the specifics of your project. It’s always best to start early in the process, as permit applications can take time to process.
Obtaining Building Permits
The process typically begins with submitting a detailed application to your local building department. This application will require comprehensive information about your project, including detailed plans and specifications of the new brick siding, the scope of work, and the materials being used. You’ll likely need to provide documentation showing proof of ownership of the property and possibly even engineer’s drawings, especially for larger or more complex projects. The building department will review your application to ensure it complies with all local building codes and regulations. Once approved, you will receive your permit, which authorizes you to begin work. Expect to pay a fee, the amount of which will vary depending on your location and the size of the project. Keep copies of all permit documentation for your records.
Local Regulations and Codes
Local building codes are designed to ensure public safety and structural integrity. These codes often specify requirements for materials, construction techniques, and even the overall aesthetic impact of the renovation. For example, some areas may have restrictions on the type of brick allowed, requiring specific fire-resistant or energy-efficient materials. Others might have stipulations regarding setbacks from property lines or the height of the brickwork. It’s vital to check with your local building department to obtain a copy of the relevant codes and regulations applicable to your project. They can also advise you on any specific requirements for brick-siding installations in your area.
Challenges in Obtaining Permits and Solutions
Potential challenges in the permitting process can include incomplete applications, non-compliance with local codes, or delays in the review process. To mitigate these challenges, ensure your application is thoroughly completed and accurately reflects the scope of your project. Engage a qualified architect or contractor experienced in navigating the local permitting process. They can help ensure your plans meet all code requirements, minimizing the risk of rejection. If your application is rejected, address the specific issues raised by the building department promptly and resubmit a revised application. Building a strong working relationship with your local building department can also help expedite the process. Regular communication and proactive problem-solving can significantly reduce delays.
Efficient Permitting Process Navigation
To navigate the permitting process efficiently, start early. Research your local building department’s requirements and procedures well in advance of starting your project. Gather all necessary documentation before submitting your application. This includes property ownership documents, detailed plans, and specifications for the materials and construction methods. Consider hiring a professional to assist with the application process if you lack the time or expertise. Regularly check the status of your application with the building department to ensure timely processing and to address any outstanding issues promptly. Maintaining open communication with the building department is key to a smooth and efficient process. Remember, a well-prepared and complete application is the best way to ensure a quick and problem-free permitting experience.
Visual Representation of Brick Siding Options

Source: factorydirectsiding.com
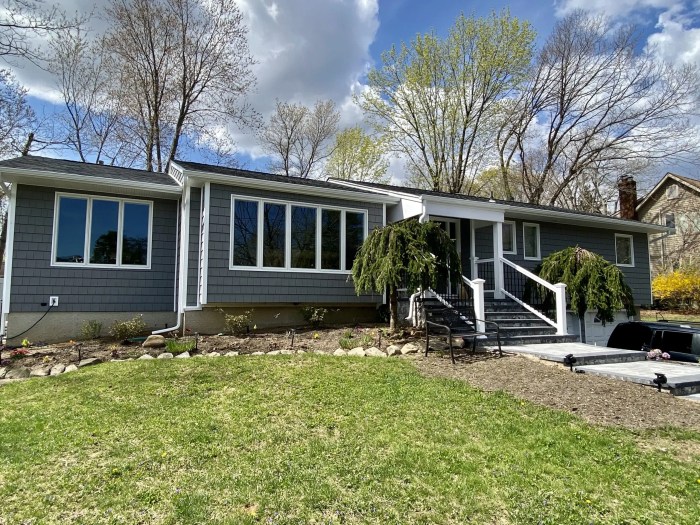
Choosing brick siding offers a wide array of aesthetic possibilities, transforming the look of your home from its foundation to its roofline. The visual impact depends heavily on the careful selection of brick type, laying pattern, and color, all of which contribute to the overall curb appeal and architectural style.
Brick patterns, textures, and colors significantly influence the final aesthetic. The interplay of these elements creates a unique visual identity for your home.
Brick Patterns and Laying Techniques
The way bricks are arranged creates distinct visual effects. Common patterns include running bond (the simplest, with bricks laid end-to-end in horizontal rows), stack bond (bricks laid vertically, creating a modern look), and herringbone (bricks laid at a 45-degree angle, adding a distinctive flair). More complex patterns, such as Flemish bonds (alternating headers and stretchers), offer a more intricate and visually rich appearance. The choice of pattern directly impacts the perceived texture and visual rhythm of the brickwork. For example, a running bond pattern gives a sense of horizontal continuity, while a herringbone pattern creates a more dynamic and textured surface.
Brick Textures and Colors
Beyond the pattern, the texture of the brick itself plays a crucial role in the overall aesthetic. Smooth bricks create a clean, modern look, while textured bricks—with variations in surface roughness—add depth and visual interest. The color palette is equally important. Traditional red bricks offer a classic, timeless appeal, while variations in shades of red, brown, gray, or even white bricks allow for a wider range of design styles, from rustic to contemporary. Consider the surrounding landscape and architectural style of your home when choosing brick colors; harmonious color schemes enhance the overall aesthetic.
Visual Contrast with Other Exterior Materials, How much to replace vinyl siding with brick
Brick siding often complements other exterior materials, creating interesting visual contrasts. For example, the warmth of brick can be beautifully offset by the clean lines of modern window frames or the natural texture of wood trim. The contrast between the rugged texture of brick and the smooth surface of stucco or stone can also add depth and visual complexity. Careful consideration of these contrasting elements can create a sophisticated and visually appealing exterior.
Before-and-After Comparison
Imagine a before-and-after image. The “before” shows a home clad in outdated, pale-yellow vinyl siding, looking somewhat bland and lacking character. The siding is showing its age with discoloration and some minor damage. The overall impression is one of uniformity and a lack of visual interest. The “after” image reveals the same home, now dramatically transformed. The vinyl siding has been replaced with a rich, deep-red brick with a subtle textured surface, laid in a running bond pattern. The new brickwork adds warmth, texture, and a sense of solidity. The home’s architectural details, previously obscured by the plain vinyl, are now highlighted and emphasized by the brick. The overall effect is a significant improvement in curb appeal, projecting a sense of permanence, sophistication, and increased property value. The updated look presents a more welcoming and visually engaging home.
Long-Term Costs and Maintenance
Source: storables.com
Switching from vinyl siding to brick is a significant investment, and understanding the long-term costs and maintenance requirements is crucial for making an informed decision. While the initial outlay for brick is higher, its longevity and lower maintenance needs can lead to cost savings over the decades. Let’s compare the ongoing expenses and durability of both materials.
Brick boasts a considerably longer lifespan and requires less frequent maintenance compared to vinyl siding. Vinyl siding, while initially cheaper, is susceptible to damage from impacts, extreme weather, and UV degradation, necessitating repairs or replacements more often. This translates to ongoing expenses that can accumulate over time. Brick, on the other hand, offers superior resistance to these factors, leading to lower long-term maintenance costs.
Brick Durability and Lifespan
The lifespan of brick siding depends heavily on the type of brick used and the quality of installation. Well-installed, high-quality brick can last for 50 years or more, even exceeding a century with proper care. For example, clay bricks, known for their strength and durability, are a popular choice for long-lasting exterior walls. However, less durable types, like some types of concrete bricks, might require more frequent maintenance and may not last as long. Factors such as exposure to harsh weather conditions and the presence of efflorescence (salt deposits) can also affect the lifespan. Proper sealing and regular cleaning can help mitigate these issues and extend the life of the brick.
Potential Brick Siding Issues and Solutions
While brick is remarkably durable, certain issues can arise over time. Cracking, due to settling or freeze-thaw cycles, is a possibility. Cracks should be addressed promptly to prevent water infiltration and further damage. This usually involves cleaning the crack, filling it with a suitable mortar, and sealing it to prevent moisture intrusion. Efflorescence, the whitish powdery deposit that appears on brick surfaces, is another common issue. It’s often caused by water carrying salts to the surface. Regular cleaning with a stiff brush and water can usually remove it. In severe cases, professional cleaning might be needed. Finally, mortar deterioration can occur over time, especially in older homes. Damaged mortar should be repaired to maintain the structural integrity and prevent water penetration.
Maintaining and Preserving Brick Siding
Regular cleaning is key to maintaining the appearance of brick siding. A simple power washing once or twice a year can remove dirt, grime, and mold. Avoid using harsh chemicals, as they can damage the brick’s surface. Inspect your brick siding regularly for cracks, loose mortar, or other damage. Addressing minor issues promptly can prevent them from becoming major problems. Consider applying a sealant every few years to protect the brick from water damage and enhance its color. This is particularly important in areas with harsh weather conditions. Proper maintenance will ensure your brick siding remains beautiful and structurally sound for many years.
Conclusive Thoughts
Transforming your home’s exterior with brick siding offers lasting beauty and increased property value. While the initial investment of replacing vinyl siding with brick can be significant, understanding the various cost factors—from material choices and labor to permits and long-term maintenance—is key to a successful project. By carefully planning and comparing quotes from reputable contractors, you can confidently embark on this rewarding home improvement journey, creating a stunning and durable facade that you’ll enjoy for years to come.
Common Queries
What are the potential hidden costs associated with this project?
Unexpected issues like foundation problems rotted wood under the siding, or necessary repairs to underlying structures can significantly increase costs. Always factor in a contingency budget for unforeseen expenses.
Can I do some of the work myself to save money?
While some demolition or prep work might be DIY-able, professional brick installation is highly recommended for a quality, lasting result. Attempting complex bricklaying without experience could lead to costly mistakes.
How long does the entire process typically take?
Project timelines vary based on house size and complexity, but expect several weeks to several months for complete vinyl removal and brick installation. Get a detailed timeline from your contractor.
What’s the best time of year to start this project?
Spring or fall are generally ideal, avoiding extreme heat or cold that can affect mortar curing and worker comfort. Check with your contractor for their recommended timeframe.
How do I find a reputable bricklaying contractor?
Get multiple bids, check references, verify licensing and insurance, and look for contractors with experience in brick-siding installation. Online reviews and local recommendations can be helpful.