Replacing Siding with Hardie Board A Comprehensive Guide
Replacing siding with Hardie board is a popular home improvement project offering durability and aesthetic appeal. This guide walks you through the entire process, from initial planning and material selection to installation, maintenance, and cost considerations. We’ll explore Hardie board’s advantages over other siding materials like vinyl, wood, and aluminum, examining lifespan, maintenance needs, and environmental impact. Get ready to transform your home’s exterior!
We’ll cover the step-by-step installation process, including essential tools and safety precautions. Understanding the cost breakdown – materials, labor, permits – is crucial for budgeting. Finally, we’ll delve into maintenance tips, common repair issues, and design possibilities to help you achieve the perfect look for your home.
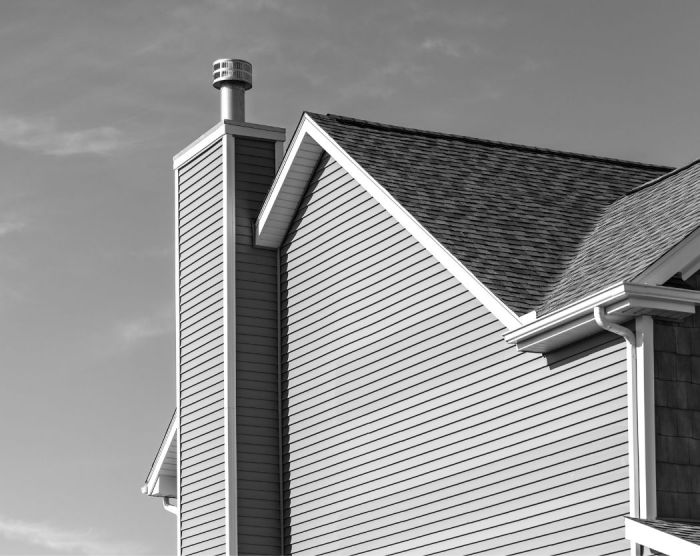
Hardie Board vs. Other Sidings
Source: myengineeringsupport.com
Choosing the right siding for your home is a big decision, impacting both its aesthetics and longevity. This section compares Hardie board with other popular siding materials, focusing on lifespan, maintenance, cost, and environmental impact. Understanding these factors will help you make an informed choice that best suits your needs and budget.
Siding Material Comparison
Let’s look at a side-by-side comparison of Hardie board, vinyl, wood, and aluminum siding across key characteristics. This table summarizes the typical lifespan, maintenance requirements, and cost considerations for each material. Keep in mind that actual costs can vary significantly based on location, labor rates, and specific product choices.
| Material | Lifespan (Years) | Maintenance | Cost (Relative) |
|---|---|---|---|
| Hardie Board (Fiber Cement) | 50+ | Minimal; occasional cleaning and repainting | High |
| Vinyl | 20-30 | Low; occasional cleaning | Low to Medium |
| Wood | 15-30 (depending on type and maintenance) | High; regular painting, staining, and potential repairs | Medium to High |
| Aluminum | 30-50 | Low; occasional cleaning | Medium |
Aesthetic Differences
Hardie board offers a range of textures and colors designed to mimic the look of wood, stone, or stucco. Its surface can be smooth, textured to resemble wood grain, or even have a deeply embossed pattern. Color options are extensive, providing versatility for various architectural styles. Vinyl siding often comes in a smoother, less textured finish with a more uniform appearance, although textured options are available. Wood siding offers natural variation in grain and color, providing a unique, rustic charm. Aluminum siding typically has a smooth, metallic finish and limited color choices, often appearing less visually appealing than other options.
Environmental Impact
The environmental impact of siding materials varies significantly. Hardie board, made from cement, sand, and cellulose fibers, is a relatively sustainable option. Its manufacturing process, while energy-intensive, results in a durable product with a long lifespan, reducing the need for frequent replacements. Vinyl siding, derived from petroleum, has a higher carbon footprint during manufacturing and is not easily recyclable. Wood siding, depending on the source, can have a lower environmental impact if harvested sustainably. However, the use of chemical treatments and the potential for wood waste must be considered. Aluminum siding requires significant energy for production but can be recycled at the end of its life. Proper disposal methods for all siding materials are crucial to minimize environmental impact. For example, many municipalities offer separate recycling programs for construction waste.
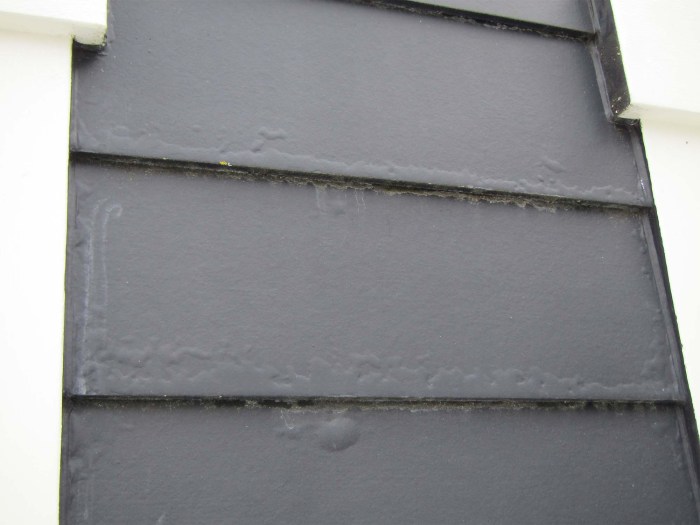
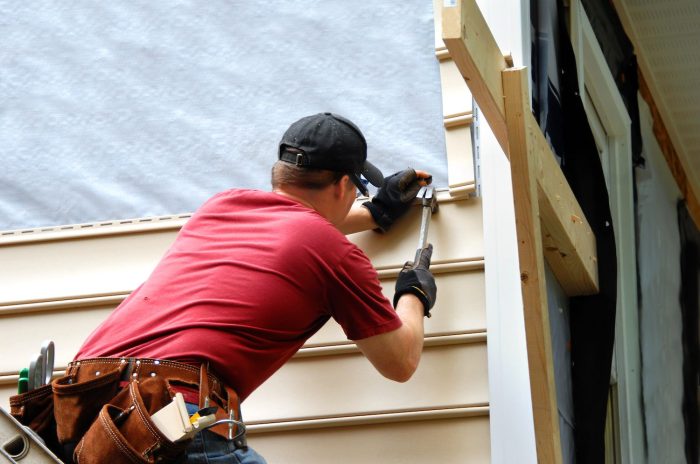
Installation Process of Hardie Board Siding
Source: wilsonexteriors.com
Installing Hardie board siding is a significant home improvement project that can dramatically enhance your home’s curb appeal and longevity. It’s a relatively straightforward process if you follow the proper steps and take the necessary precautions. This section details the installation process, necessary tools, and crucial considerations for moisture management and ventilation.
The installation process generally involves three main phases: removing the old siding, preparing the house, and installing the Hardie board. Each phase requires careful attention to detail to ensure a successful and long-lasting installation.
Removing Existing Siding
Before you can install new siding, you need to remove the old siding. This is often the most labor-intensive part of the project. Proper removal prevents damage to the underlying sheathing and allows for a clean, even surface for the new siding.
- Carefully remove nails or staples securing the existing siding, starting from the bottom and working your way up. Use a pry bar and hammer to gently loosen and remove each piece of siding.
- Inspect the underlying sheathing for any damage, rot, or insect infestation. Repair or replace any damaged sections before proceeding.
- Clean the sheathing thoroughly to remove any loose debris, dirt, or old caulking.
Preparing the House for New Siding
Once the old siding is removed, preparing the house for the new Hardie board is crucial for a successful installation. This involves ensuring a smooth, clean surface and addressing any underlying issues.
- Repair any damaged sheathing, replacing rotted or damaged areas with new plywood or OSB sheathing.
- Ensure all flashing around windows and doors is in good condition and properly sealed. Replace any damaged or deteriorated flashing.
- Install house wrap or building paper over the sheathing to provide an additional layer of protection against moisture.
- Install any necessary furring strips to create a level surface for the Hardie board.
Installing Hardie Board Siding
The actual installation of Hardie board siding requires precision and attention to detail to ensure a watertight and aesthetically pleasing finish. Proper fastening and overlapping are critical.
- Start at the bottom of the wall and work your way up, installing the first course of siding horizontally. Maintain consistent spacing between each piece.
- Use galvanized nails or screws specifically designed for the Hardie board, ensuring proper penetration into the sheathing.
- Overlap each piece of siding according to the manufacturer’s instructions, typically 1/2 inch to ensure a weather-tight seal.
- Caulk all seams and joints to prevent water penetration. Use a high-quality exterior-grade caulk.
- Install trim and corner pieces as needed, ensuring proper alignment and sealing.
Necessary Tools and Materials
Having the right tools and materials on hand will streamline the installation process and ensure a quality outcome. Organize your materials for efficient workflow.
| Category | Tools/Materials |
|---|---|
| Cutting Tools | Circular saw with fine-tooth blade, hand saw, utility knife, and measuring tape. |
| Fastening Tools | Nail gun (recommended), hammer, drill, galvanized nails or screws |
| Safety Equipment | Safety glasses, work gloves, dust mask, hearing protection, ladder |
| Other Materials | Hardie board siding, house wrap, flashing, caulk, furring strips (if needed), primer, paint (optional) |
Ventilation and Moisture Management
Proper ventilation and moisture management are critical to preventing damage to the Hardie board and extending its lifespan. Moisture is the enemy of wood and fiber cement products.
- Ensure adequate ventilation in the wall cavity by using proper soffit vents and ridge vents to allow for air circulation. This prevents moisture buildup behind the siding.
- Properly install flashing around windows, doors, and other openings to prevent water from penetrating the wall system. Flashing should be installed before the siding.
- Use a water-resistant barrier, such as house wrap, under the siding to provide an additional layer of protection against moisture. Overlapping seams properly is crucial.
- Caulk all seams and joints thoroughly to prevent water from entering. Use a high-quality, exterior-grade caulk that is paintable if desired.
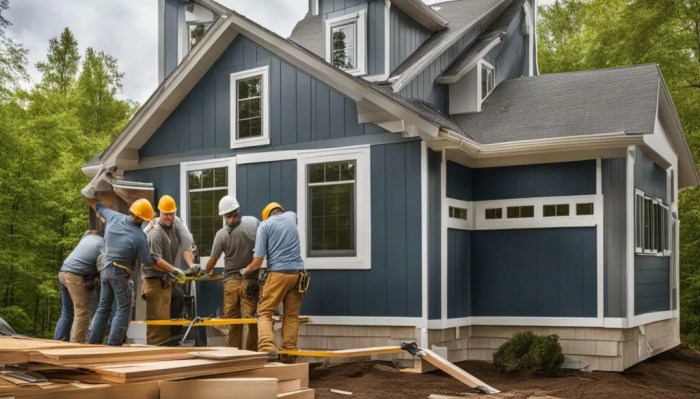
Cost Considerations for Hardie Board Siding Replacement: Replacing Siding With Hardie Board
Replacing your siding with Hardie board is a significant investment, but understanding the cost breakdown can help you budget effectively. Several factors influence the final price, so it’s crucial to get accurate estimates from multiple contractors before making a decision. This section will break down the various cost components and discuss factors affecting the overall expense.
Cost Breakdown of Hardie Board Siding Replacement
The total cost of replacing your siding with Hardie board is a sum of several key components. These costs can vary widely depending on your location, house size, and the complexity of the project. The following table provides a general estimate; it’s vital to obtain personalized quotes from contractors in your area.
| Cost Category | Estimated Cost | Factors Affecting Cost |
|---|---|---|
| Materials (Hardie Board, Fasteners, Flashing, etc.) | $5,000 – $15,000+ | House size, siding type chosen (e.g., lap siding, panels), material quality, regional pricing variations. Larger houses and more intricate designs require more materials. |
| Labor | $5,000 – $15,000+ | The complexity of the installation (e.g., multiple stories, intricate trim work), labor rates in your region, contractor experience, and the project’s duration. Highly skilled labor commands higher rates. |
| Permits | $500 – $2,000 | Local building codes and permit requirements vary widely. Larger projects often require more extensive permits and inspections. |
| Waste Disposal | $500 – $1,500 | Amount of old siding to be removed, local waste disposal regulations, and disposal methods used. Proper disposal of asbestos-containing materials (if present) adds significant cost. |
| Total Estimated Cost | $10,500 – $43,500+ | All factors listed above contribute to the final cost. This is a broad range; actual costs will vary greatly depending on the specific circumstances. |
Factors Influencing Overall Cost
Several factors significantly impact the final cost of a Hardie board siding replacement. Understanding these factors helps in budgeting accurately and making informed decisions.
The size of your house is a primary driver of cost. A larger house requires more materials and labor, directly increasing the overall expense. The complexity of the installation also plays a crucial role. Houses with intricate designs, multiple stories, or extensive trim work require more time and specialized skills, thus increasing labor costs. Regional variations in labor and material prices are another major factor. Labor rates and material costs can differ significantly depending on your location, with higher costs in areas with high demand and limited supply. For example, a project in a major metropolitan area will likely be more expensive than a similar project in a rural area.
Long-Term Cost-Effectiveness of Hardie Board Siding, Replacing Siding with Hardie board
While the upfront cost of Hardie board siding is higher than some alternatives, its long-term cost-effectiveness is a significant advantage. Hardie board is incredibly durable and resistant to damage from weather, insects, and fire, reducing the need for frequent repairs and maintenance. This durability translates to lower long-term costs compared to sidings requiring more frequent painting, repairs, or even complete replacement. For instance, vinyl siding may require replacement after 15-20 years due to fading and damage, while properly installed Hardie board can last 50 years or more with minimal maintenance. This longevity makes the Hardie board a more cost-effective choice over the long run, despite the higher initial investment.
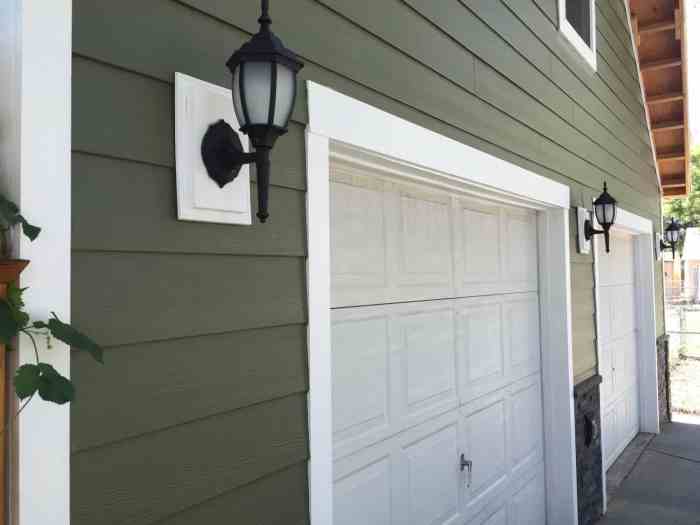
Maintenance and Repair of Hardie Board Siding

Source: sidingrepair.ca
Hardie board siding, while durable, requires regular maintenance to ensure its longevity and attractive appearance. Neglecting upkeep can lead to premature deterioration and costly repairs. This section Artikels best practices for maintaining and repairing your Hardie board siding, helps you keep your home looking its best for years to come.
Routine Maintenance Checklist
Regular inspections are key to catching small problems before they become big ones. A yearly check-up will help identify potential issues early, saving you time and money in the long run. This checklist provides a structured approach to maintaining your Hardie board siding.
- Inspect for Damage: Carefully examine the entire siding surface for cracks, dents, loose pieces, or signs of water damage. Pay close attention to areas prone to impact, such as corners and near ground level.
- Check Caulking and Sealants: Inspect all caulked areas, such as around windows and doors, for cracks or gaps. Reapply caulking as needed to prevent water intrusion.
- Clean Gutters and Downspouts: Ensure gutters and downspouts are clear of debris to prevent water from accumulating against the siding.
- Trim Overhanging Branches: Keep tree branches trimmed back from the siding to prevent scratching and damage from falling debris.
- Clean Siding Annually: A thorough cleaning removes dirt, mildew, and other contaminants, maintaining the siding’s appearance and protecting it from damage.
Addressing Common Issues
Hardie board siding is resilient, but it’s not indestructible. Understanding common issues and their solutions is crucial for effective maintenance.
- Weather Damage: Exposure to harsh weather conditions, such as intense sun, rain, and freezing temperatures, can cause fading, cracking, or warping. Regular cleaning and prompt repair of any damage are essential to mitigate these effects. For example, a severely cracked panel might require replacement.
- Impact Damage: Impacts from objects, such as hail or flying debris, can cause dents or holes in the siding. Small dents might be repairable with filler, while larger holes may necessitate panel replacement. A strong impact might cause a larger area to become compromised and require more extensive repair or replacement.
- Mildew and Algae: Mildew and algae can grow on Hardie board siding, especially in shaded or humid areas. Regular cleaning with a suitable solution (see cleaning section below) prevents this growth.
Cleaning Hardie Board Siding
Cleaning your Hardie board siding is a crucial maintenance step. Regular cleaning helps maintain its appearance and protects it from damage.
For routine cleaning, a solution of mild detergent and water is usually sufficient. Apply the solution with a soft-bristled brush or pressure washer (using a low-pressure setting to avoid damaging the siding). Rinse thoroughly with clean water afterward. For more stubborn stains or mildew, a solution of bleach and water (following the manufacturer’s instructions) can be used. Always test any cleaning solution on a small, inconspicuous area first to ensure it doesn’t damage the siding’s finish. Never use abrasive cleaners or scrub brushes, as these can scratch the surface.
Painting Hardie Board Siding
Painting Hardie board siding can refresh its appearance and add protection. Before painting, ensure the siding is clean, dry, and free from any damage. Use a high-quality exterior paint designed for fiber cement siding, following the manufacturer’s instructions for application. Prime the siding if necessary, especially if it’s new or unpainted. Apply multiple thin coats for even coverage, allowing each coat to dry completely before applying the next. A good quality paint will provide better protection against the elements and prolong the life of your siding. For example, using a paint specifically designed for fiber cement siding will provide better adhesion and durability than using a standard house paint.
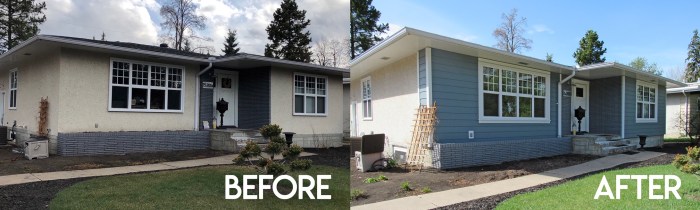
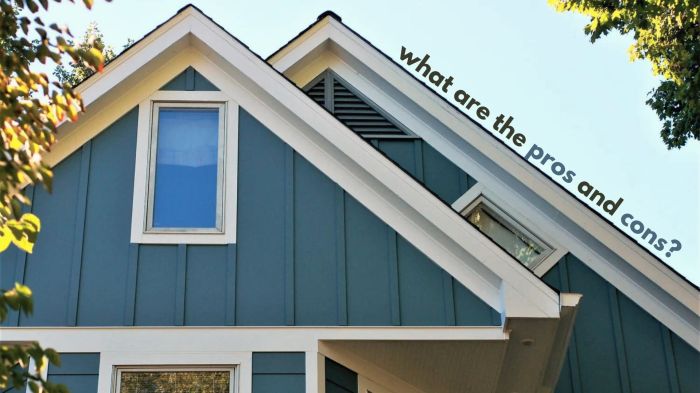
Design Considerations for Hardie Board Siding

Source: sawshub.com
Choosing Hardie board siding opens a world of design possibilities. Its versatility allows for a wide range of aesthetic choices, from classic to contemporary, seamlessly blending with various architectural styles and personal preferences. Careful consideration of color, trim, and installation patterns is crucial for achieving the desired look and feel for your home’s exterior.
Hardie board’s inherent durability and low-maintenance nature make it a smart choice for homeowners wanting a long-lasting, attractive exterior. Its ability to mimic the look of wood, brick, or stone, without the associated upkeep, adds to its appeal. Let’s explore how you can leverage these characteristics to enhance your home’s curb appeal.
Design Options and Styles Achievable with Hardie Board Siding
The design flexibility of the Hardie board is remarkable. You’re not limited to a single color or pattern; instead, you can create a truly unique and personalized look for your home. The following points highlight some of the many options available:
- Color Palettes: Hardie board offers a vast array of colors, from subtle neutrals like creamy whites and soft grays to bolder choices such as deep blues, vibrant reds, or earthy greens. Consider your home’s architectural style, surrounding landscape, and personal preferences when making your selection. For example, a craftsman-style home might look stunning with a warm, earthy palette, while a modern home could benefit from a sleek, monochromatic scheme.
- Trim Styles: Trim significantly impacts the overall aesthetic. Consider using contrasting colors or textures to create visual interest. Options range from simple, clean lines to more ornate details, such as decorative molding or corner boards. A wider trim might accentuate a home’s horizontal lines, while a narrower trim could emphasize verticality. The choice depends on the desired effect and architectural style.
- Installation Patterns: The way the Hardie board is installed also affects the final look. Traditional horizontal lap siding is a classic choice, offering a clean, timeless appearance. However, you can also explore vertical siding for a more modern feel or even a combination of horizontal and vertical patterns for a unique, layered effect. Consider using different panel widths to create visual rhythm and interest.
Hardie Board Siding and Architectural Styles
Hardie board’s adaptability makes it suitable for a wide variety of architectural styles. Its ability to mimic other materials, coupled with its diverse color and trim options, ensures a harmonious blend with the existing architectural design.
- Craftsman Style: Warm, earthy tones, such as browns, greens, and creams, paired with exposed beams and natural wood accents, complement the handcrafted feel of Craftsman homes. Horizontal lap siding is a classic choice for this style.
- Victorian Style: The intricate details of Victorian architecture are well-suited to the Hardie board’s versatility. Consider using a mix of colors and textures, incorporating decorative trim and molding to accentuate the home’s ornate features. A darker, richer color palette can enhance the dramatic feel of this style.
- Modern Style: Clean lines and a minimalist aesthetic are key to modern architecture. Hardie board in neutral colors, such as gray, white, or black, with minimal trim, creates a sophisticated and contemporary look. Vertical siding or large-format panels can further emphasize the modern feel.
The Role of Professional Design Consultation
While choosing Hardie board siding offers many options, professional design consultation can be invaluable. A designer can help you navigate the choices, considering factors such as your home’s architectural style, the surrounding landscape, your budget, and your personal preferences. They can provide expert advice on color palettes, trim styles, and installation patterns, ensuring the final result complements your home and enhances its curb appeal. A professional consultation can save you time, money, and potential regrets by helping you make informed decisions from the outset.
Closing Notes
Upgrading your home’s siding with Hardie board offers a significant return on investment, enhancing curb appeal and protecting your home for years to come. By carefully considering the factors discussed – material selection, installation process, cost analysis, and long-term maintenance – you can confidently embark on this transformative project. Remember, proper planning and potentially professional assistance ensure a successful and beautiful outcome. So, are you ready to get started?
Answers to Common Questions
Can I install Hardie board siding myself?
While DIY is possible, it’s a demanding project. Consider your skill level and the complexity of your home’s exterior before attempting it alone. Professional installation ensures proper techniques and a longer-lasting result.
How long does Hardie board siding last?
With proper installation and maintenance, Hardie board siding can last 50 years or more, significantly longer than many other siding options.
What are the warranty options for the Hardie board?
James Hardie, the manufacturer, offers various warranties depending on the specific product and installation. Check their website for detailed information.
Does Hardie board siding require painting?
While primed and ready for painting, it’s not strictly necessary. Many homeowners choose to leave it in its natural color, but painting offers additional protection and customization.
Is Hardie board siding fire-resistant?
Hardie board is highly fire-resistant, but it’s not completely fireproof. It offers better protection than many other siding materials.